How Long to Cook Chicken on a Grill – Times & Temps Guide
Look, I’ve been standing over grills and smokers for the better part of two decades now, and if there’s one question I get asked more than any other — at competitions, at the restaurant, on my blog, at backyard cookouts — it’s this: how long to cook chicken on a grill?
And honestly? I get it. Chicken is tricky. It’s not like a steak where you can get away with a little pink in the middle and call it “medium-rare.” With chicken, you’ve got a narrow window between “dangerously undercooked” and “dry as shoe leather,” and nobody wants to land on either side of that line.
So today I’m laying it all out — every cut, every temperature, every little trick I’ve picked up over the years. Whether you’re grilling boneless breasts for a weeknight dinner or slow-roasting a whole bird for Sunday supper, this guide has you covered.
Why Getting Chicken Right on the Grill Actually Matters
Here’s the thing — chicken is probably the most forgiving AND the most punishing protein you can throw on a grill. Sounds contradictory, I know. But hear me out.
It’s forgiving because it takes on flavor like nothing else. A simple brine, a good rub, a decent marinade — chicken soaks it all up. But it’s punishing because overcook it by even five or six minutes and you’ve got yourself an expensive chew toy. And undercook it? Well, nobody wants to spend their evening in the bathroom instead of enjoying the party.
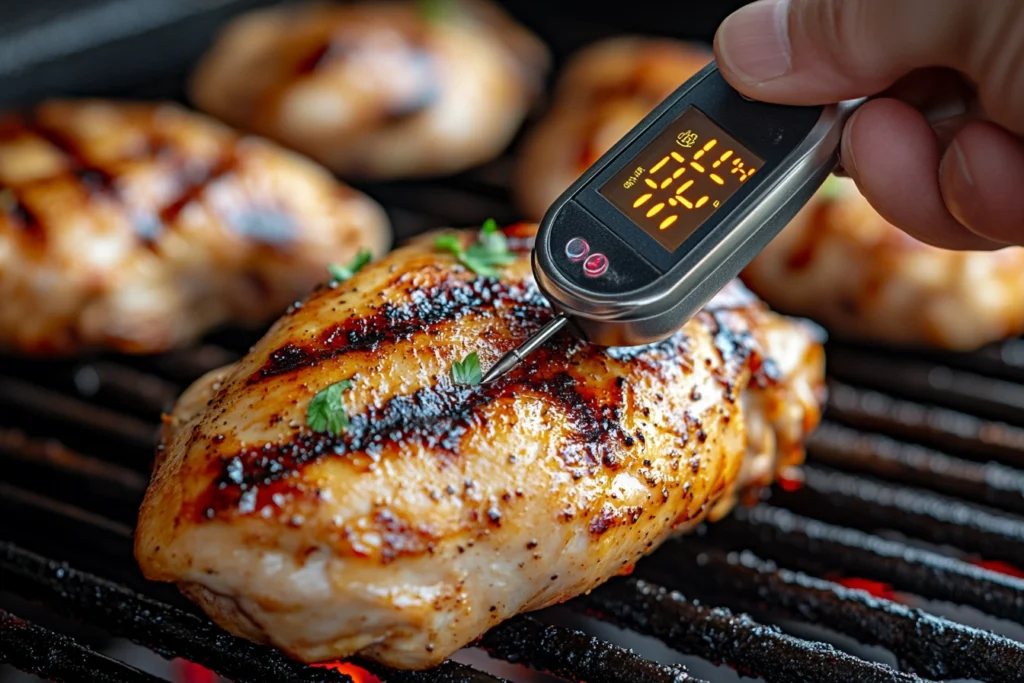
I learned this the hard way back when I was first starting out in culinary school. Made what I thought was a beautiful batch of grilled thighs for a class project. Looked incredible. Golden brown, gorgeous grill marks. Took a bite and… still pink at the bone. My instructor didn’t let me live that one down for months. That was the day I bought my first instant-read thermometer, and I haven’t grilled without one since.
The Golden Rule: It’s About Temperature, Not Just Time
Before I get into the specific times for each cut, let me drill this into your head: the internal temperature of your chicken matters more than any timer on your phone.
Every piece of chicken is different. A thick breast from the grocery store is going to cook differently than a thinner one from your local butcher. Bone-in pieces hold heat differently than boneless. The weather outside, your grill’s hot spots, whether you opened the lid to peek (we all do it, don’t lie) — all of these things affect cooking time.
The USDA says chicken is safe to eat at 165°F (74°C) internal temperature. That’s your magic number. That said, dark meat like thighs and drumsticks actually tastes better at 175-180°F (79-82°C) because the extra heat renders more of the connective tissue and fat, giving you that juicy, pull-apart texture.
So in my experience, here’s what I aim for:
- Chicken breasts: Pull at 160°F and let carryover cooking bring it to 165°F
- Thighs and drumsticks: 175-180°F for best texture
- Whole chicken: 165°F in the thickest part of the thigh (not touching bone)
- Wings: 175-180°F (they’re dark meat, people forget that)
Invest in a good instant-read thermometer. I mean it. It’s the single best $15-30 you’ll ever spend on your grilling game.
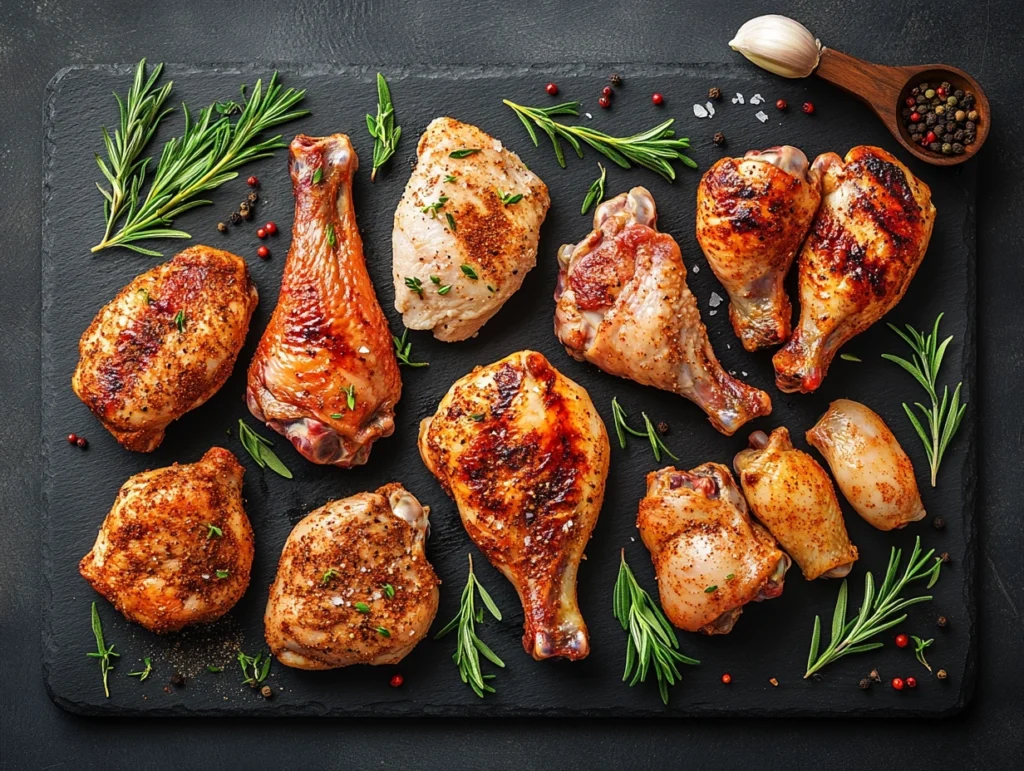
How Long to Cook Chicken on a Grill: The Complete Breakdown
Alright, here’s what you really came for. I’ve put together a master reference table based on years of grilling across different setups — gas, charcoal, you name it. These times assume a properly preheated grill with the lid closed.
Quick Reference: Chicken Grilling Times & Temperatures
| Cut | Grill Temp | Cooking Time | Target Internal Temp | Method |
|---|---|---|---|---|
| Boneless, Skinless Breasts | 400-450°F (204-232°C) | 6-8 min per side | 165°F (74°C) | Direct heat |
| Bone-In, Skin-On Breasts | 375-400°F (190-204°C) | 10-15 min per side | 165°F (74°C) | Direct + indirect |
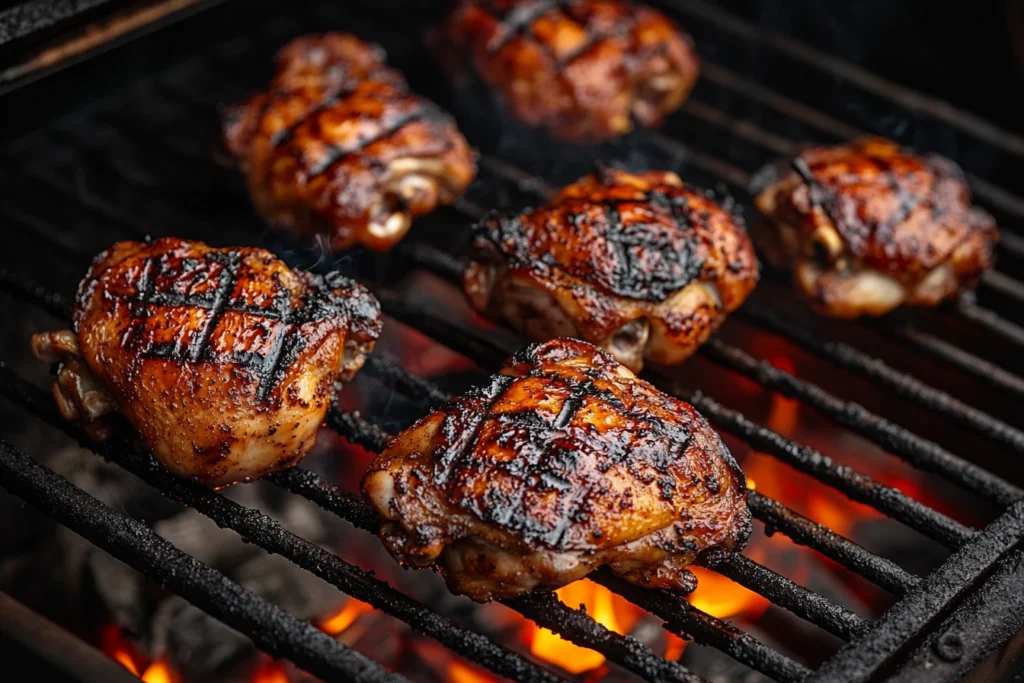
| Boneless, Skinless Thighs | 400-450°F (204-232°C) | 5-7 min per side | 175°F (79°C) | Direct heat |
| Bone-In, Skin-On Thighs | 375-400°F (190-204°C) | 8-12 min per side | 175°F (79°C) | Direct + indirect |
| Drumsticks | 375-400°F (190-204°C) | 25-35 min total (turning every 5-7 min) | 175°F (79°C) | Direct + indirect |
| Wings | 400-450°F (204-232°C) | 20-25 min total (flipping halfway) | 175°F (79°C) | Direct heat |
| Whole Chicken (4-5 lbs) | 350-375°F (177-190°C) | 1 to 1.5 hours | 165°F (74°C) in thigh | Indirect heat |
| Spatchcocked Chicken | 375-400°F (190-204°C) | 35-45 min | 165°F (74°C) in thigh | Indirect with sear |
Now let me break each one down, because the devil is absolutely in the details.
Grilling Boneless, Skinless Chicken Breasts
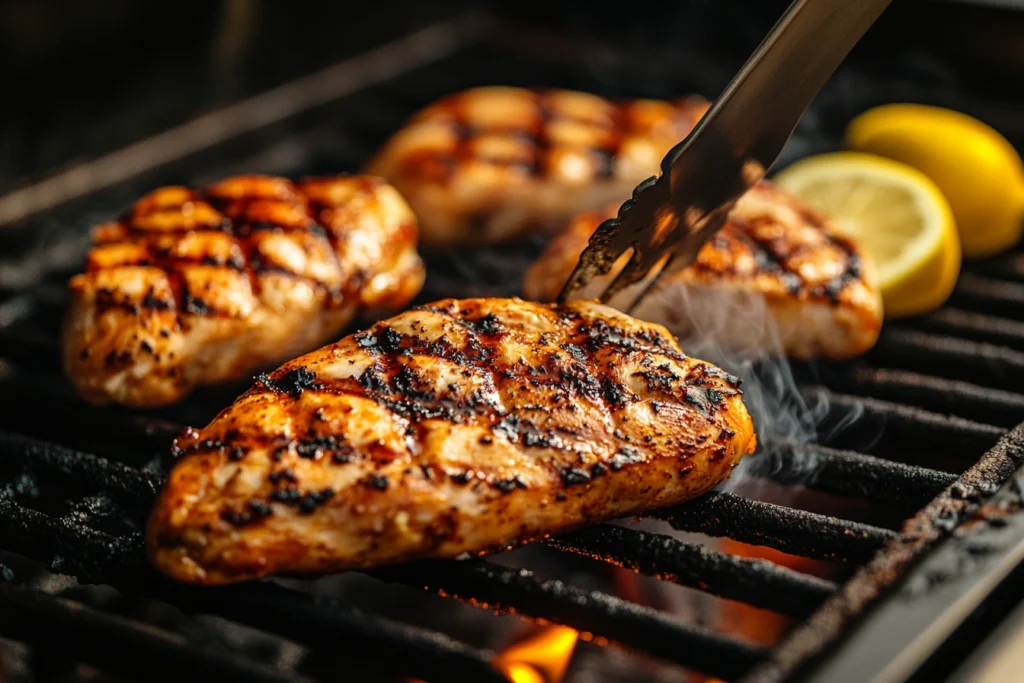
Ah, the boneless skinless breast. The most popular — and the most abused — cut of chicken in America. I see people destroy these things every single weekend, and it breaks my heart.
The Problem With Breasts
Boneless breasts are uneven. One end is thick, the other tapers to almost nothing. That thin end is going to overcook while the thick end is still raw in the middle. This is the number one reason people end up with dry chicken.
How I Fix It
Pound them out. Seriously, throw your breast in a zip-lock bag and use a meat mallet (or a heavy skillet, or even a wine bottle — no judgment) to even out the thickness to about ¾ inch. This single step will change your grilled chicken game forever.
Or — and this is my preferred method these days — butterfly the breast. Slice it horizontally almost all the way through and open it like a book. Same result, less mess.
Grilling Instructions for Boneless Breasts
Grill temperature: 400-450°F (direct heat)
Cooking time: 6-8 minutes per side
- Preheat your grill to medium-high heat (400-450°F) with the lid closed for at least 10-15 minutes
- Pat the chicken dry with paper towels — this is crucial for good grill marks and preventing sticking
- Season generously with salt, pepper, and whatever rub or marinade you like (I’ve got a Kansas City-style rub that I use on everything, might share it one day)
- Oil the grates, not the chicken — grab a paper towel soaked in vegetable oil with long tongs and wipe down the grates
- Place breasts on the grill at a 45-degree angle to the grates (this gives you those diamond grill marks if you rotate 90 degrees halfway through each side)
- Close the lid and resist the urge to fiddle. 6-8 minutes on the first side
- Flip once. Just once. 6-8 minutes on the other side
- Check temp — pull at 160°F and rest for 5 minutes. Carryover will bring it to 165°F
Pro tip from the restaurant: I always brine my boneless breasts for at least 30 minutes before grilling. Simple brine — 4 cups water, ¼ cup salt, 2 tablespoons sugar. It makes a world of difference in moisture retention. Trust me on this one.
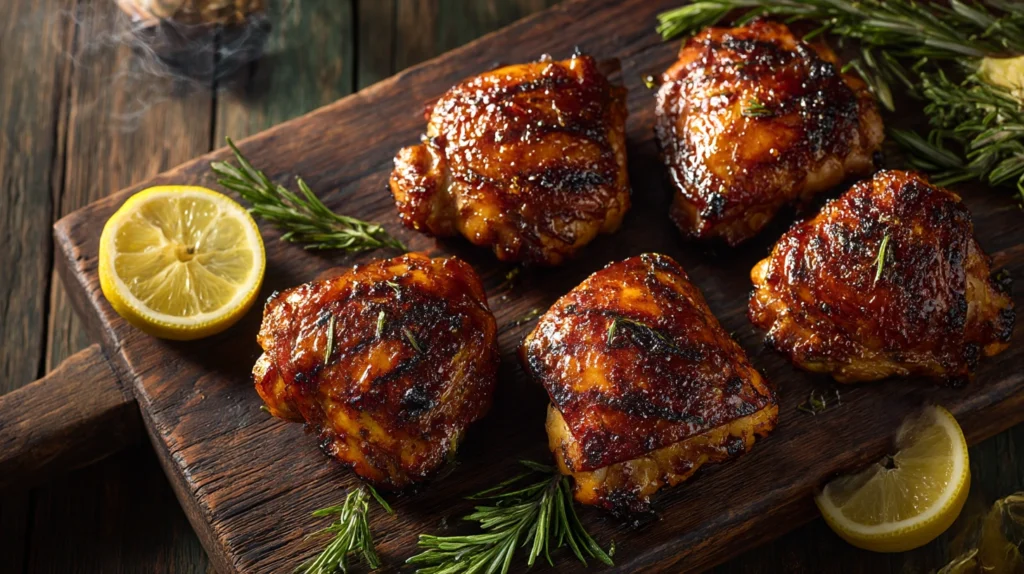
Grilling Bone-In, Skin-On Chicken Breasts
Now we’re talking. Bone-in breasts are more forgiving than boneless because the bone acts as an insulator, and the skin protects the meat from drying out. They take longer, but the flavor payoff is huge.
The Two-Zone Approach
This is where understanding direct vs. indirect heat becomes essential. You want to use what I call the “two-zone” method:
Zone 1 (Direct heat): Sear the skin side to get it crispy and golden Zone 2 (Indirect heat): Move it to the cooler side to finish cooking through without burning the outside
Grilling Instructions for Bone-In Breasts
Grill temperature: 375-400°F
Cooking time: 20-30 minutes total
- Set up your grill for two-zone cooking — all burners on one side (gas) or coals on one side (charcoal)
- Start skin-side down over direct heat for 5-7 minutes until the skin is crispy and golden
- Flip and sear the other side for 3-4 minutes
- Move to the indirect side, skin-side up, and close the lid
- Cook for another 10-15 minutes until the internal temp hits 165°F
- Rest for 5-10 minutes before serving
The key mistake I see people make with bone-in breasts is trying to cook them entirely over high direct heat. The outside chars before the inside cooks through every single time. The two-zone method solves this.
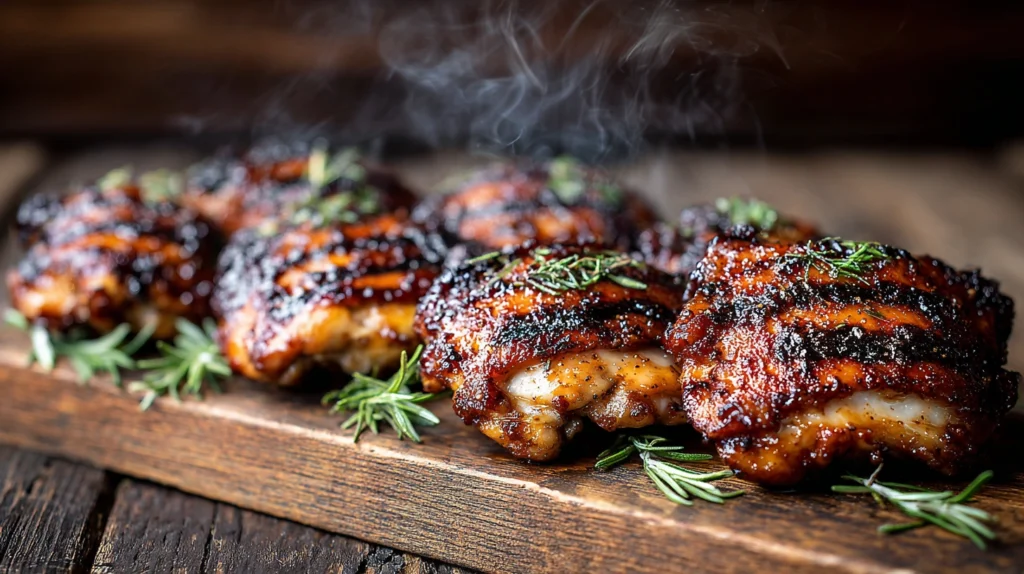
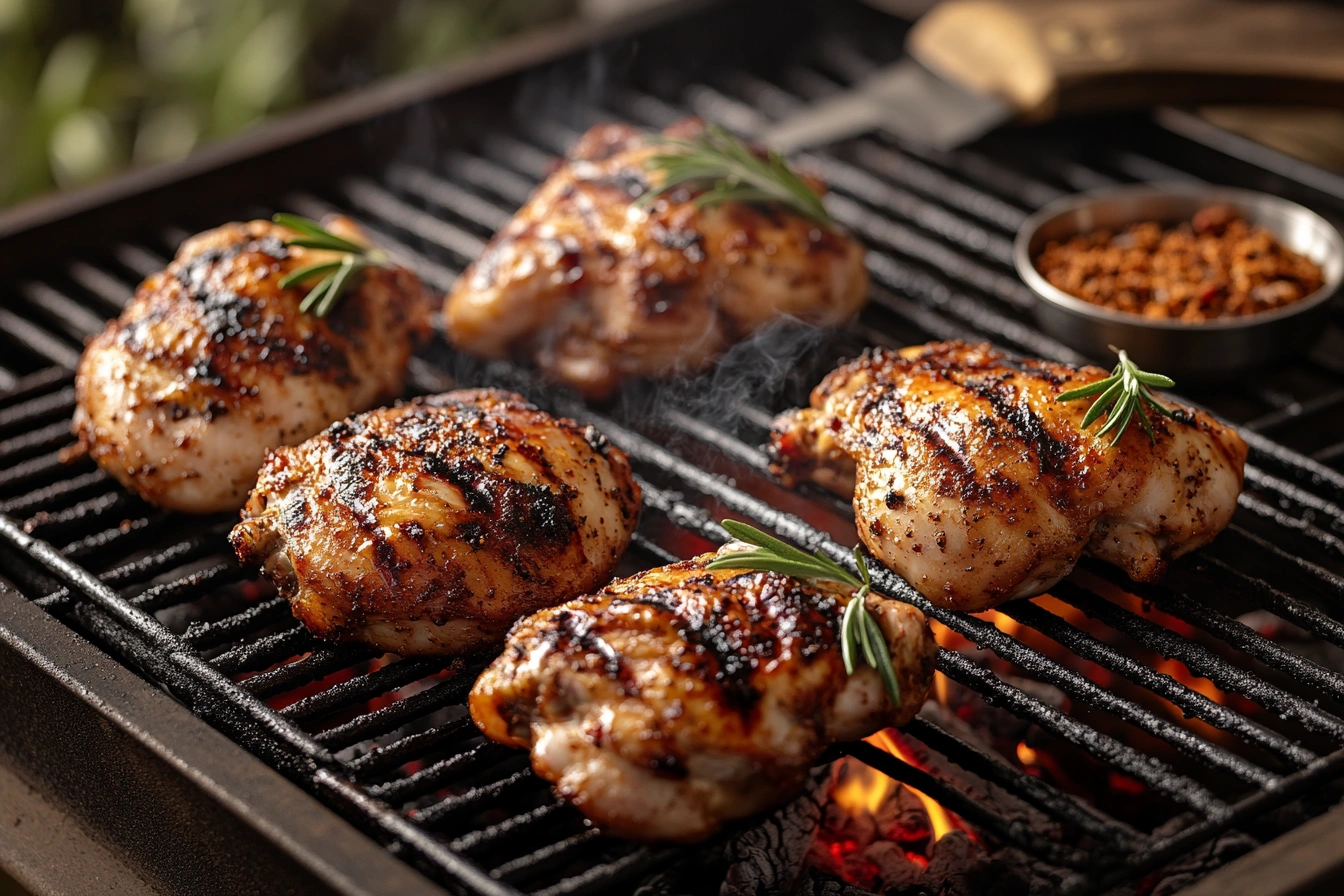
Grilling Chicken Thighs (Boneless and Bone-In)
Thighs are my favorite cut to grill, hands down. I’ll say that with zero hesitation. They’re more flavorful than breasts, way harder to overcook, and they’re cheaper too. What’s not to love?
Why Thighs Are More Forgiving
Thighs have more fat and connective tissue than breasts. That fat bastes the meat from the inside as it cooks, and the collagen in the connective tissue breaks down into gelatin at higher temperatures, which is why they stay juicy even when you push past 165°F. Honestly, I think thighs taste best at 175-180°F — that’s the sweet spot where everything melts together.
Boneless Thighs
Grill temperature: 400-450°F (direct heat)
Cooking time: 5-7 minutes per side
Boneless thighs cook fast and they tend to curl up on the grill. A couple of tricks: score the meat side with shallow cuts to prevent curling, or press them flat with a spatula for the first minute or so. Season them well — thighs love bold flavors. My go-to is a mix of smoked paprika, garlic powder, onion powder, brown sugar, salt, pepper, and a little cayenne.
Bone-In, Skin-On Thighs
Grill temperature: 375-400°F
Cooking time: 8-12 minutes per side
Use the same two-zone method I described for bone-in breasts. Start skin-side down over direct heat, get that skin crackling and rendered, then move to indirect to finish. These are ridiculously good. At the restaurant, bone-in thighs are our best seller during the summer months, and there’s a good reason for it.
Watch out for flare-ups. Thighs have more fat than any other chicken cut, and when that fat drips onto hot coals or burners, you’ll get flames. Keep a spray bottle of water nearby, or just move the pieces to the cool zone if things get out of hand. Whatever you do, don’t panic and don’t walk away.
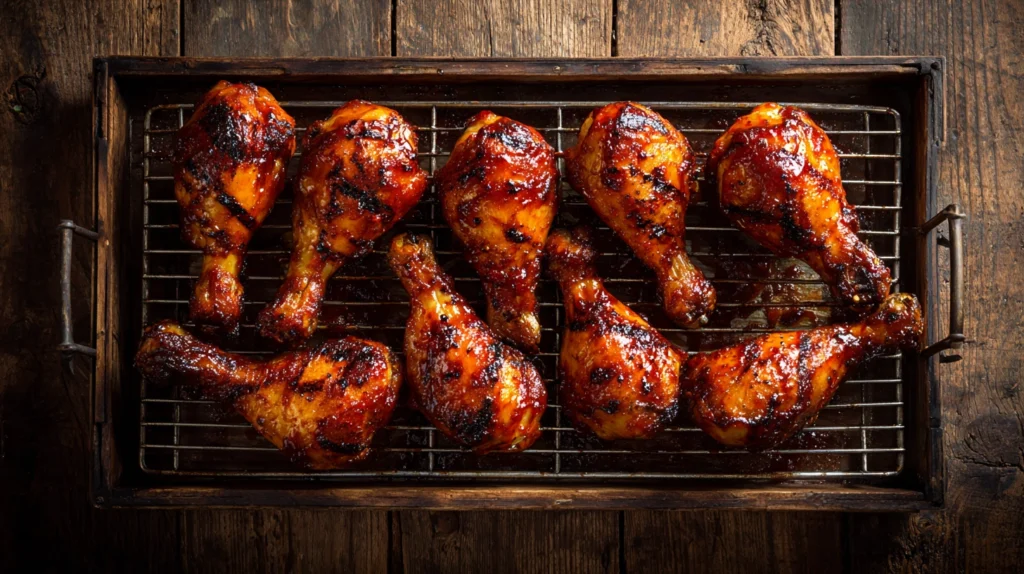
Grilling Chicken Drumsticks

Drumsticks are the unsung heroes of the backyard barbecue. They’re cheap, kids love them, and they’re practically custom-built for eating with your hands. The challenge? Getting that weird rubbery skin situation under control.
The Drumstick Technique
Grill temperature: 375-400°F
Cooking time: 25-35 minutes total, turning every 5-7 minutes
Here’s my method for perfect drumsticks:
- Pat them dry — I mean really dry. Paper towels, both sides, get all the moisture off that skin
- Toss them in a light coating of baking powder (not baking soda!) mixed with your seasonings. About ½ teaspoon of baking powder per pound of drumsticks. This is an old restaurant trick — the baking powder raises the pH of the skin and helps it crisp up
- Start them over direct heat, turning every 5-7 minutes for even browning
- After about 15 minutes, move to indirect heat and close the lid
- Continue cooking until they hit 175°F internal, another 10-15 minutes
- If you want to sauce them, do it in the last 5 minutes — any earlier and the sugar in the sauce will burn
Anyway, drumsticks are one of those cuts where patience really pays off. Rushing them over high heat will leave you with charred skin and raw meat at the bone. Low and slow-ish is the way to go.
Grilling Chicken Wings
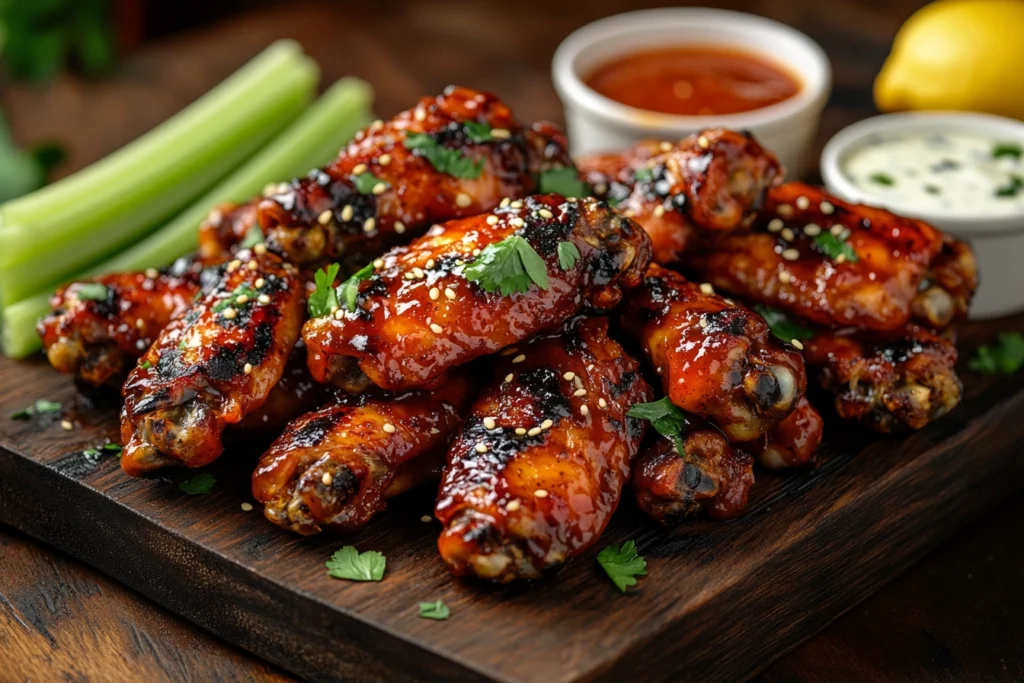
Wings on the grill are a whole different animal (pun intended) compared to deep-fried wings. You get that smoky char flavor that you simply cannot replicate in a fryer. Competition season in Kansas City means I’m doing wings almost every week, and I’ve got this down to a science.
Wing Grilling Method
Grill temperature: 400-450°F
Cooking time: 20-25 minutes total
- Separate into flats and drumettes (or leave whole, your call — I prefer separated for even cooking)
- Toss in a little oil and your dry rub
- Place on the grill over direct heat
- Flip every 5-6 minutes for even crisping — you’ll turn them about 4 times total
- In the last 2-3 minutes, toss with your sauce of choice if desired
- Pull when they hit 175-180°F
Here’s a trick most people don’t know: after grilling, toss the wings in a bowl with your sauce, then throw them back on the grill for 60-90 seconds per side. This caramelizes the sauce and creates this incredible sticky glaze. Game changer.
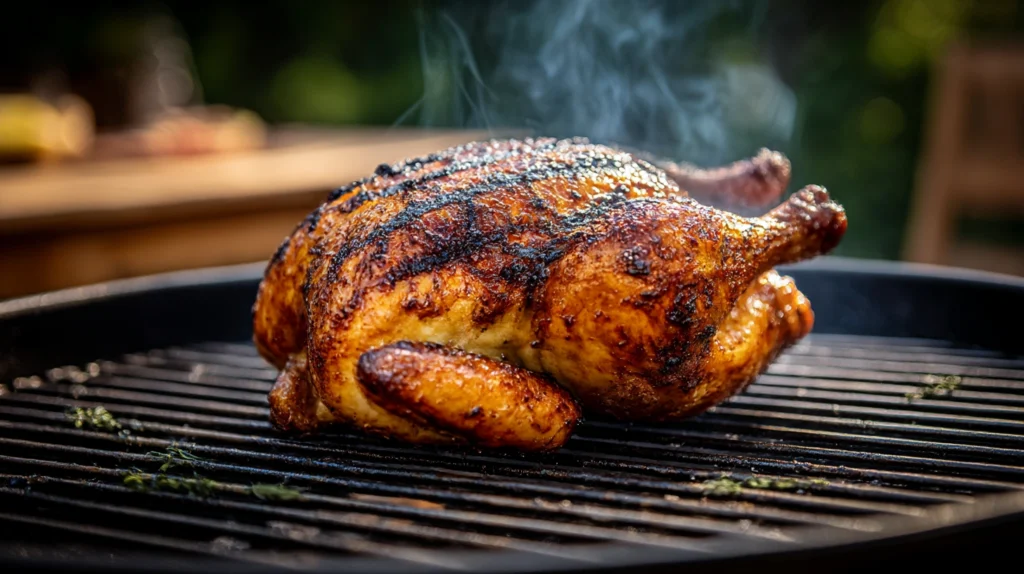
Grilling a Whole Chicken
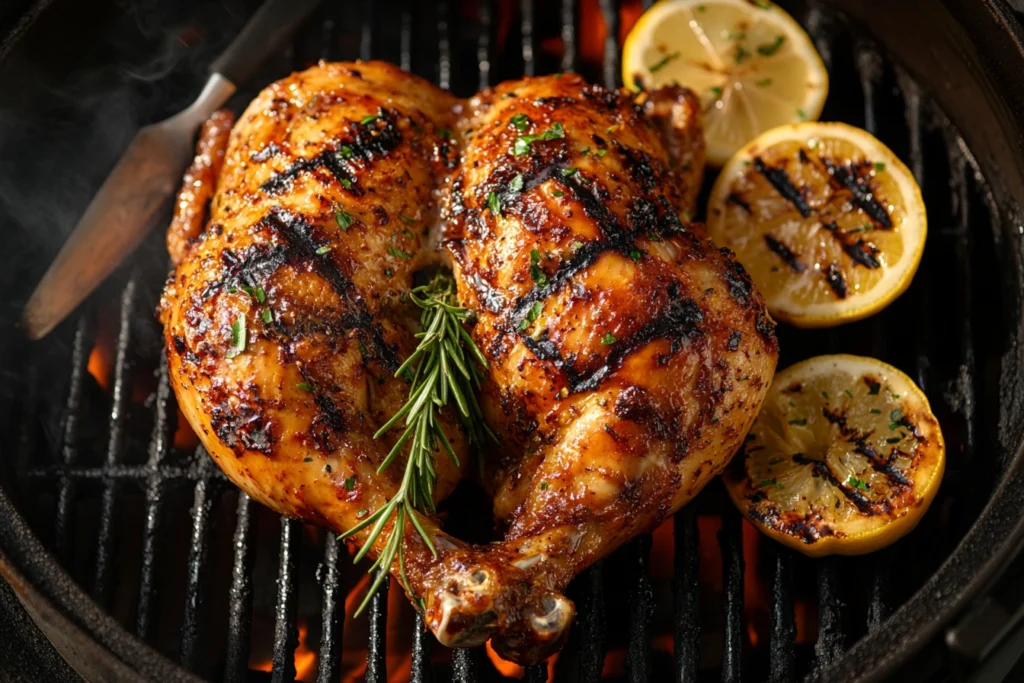
Now we’re in the big leagues. A whole grilled chicken, done right, is one of the most impressive things you can put on a dinner table. The skin gets this deep mahogany color, the meat is juicy from top to bottom, and the smell alone will have your neighbors peeking over the fence.
Indirect Heat Is Non-Negotiable
You cannot grill a whole chicken over direct heat. I don’t care what your uncle told you. A 4-5 pound chicken needs gentle, indirect heat to cook evenly all the way through.
Whole Chicken Grilling Instructions
Grill temperature: 350-375°F (indirect)
Cooking time: 1 to 1.5 hours
- Remove the giblets (check both cavities — I’ve found giblet bags hiding in the neck cavity more times than I can count)
- Pat the entire bird dry inside and out
- Season generously under the skin of the breasts — gently loosen the skin with your fingers and rub your seasoning directly on the meat
- Truss the legs with kitchen twine (this isn’t just for looks — it helps the bird cook evenly)
- Set up your grill for indirect cooking — heat on both sides with the chicken in the middle, or heat on one side with the chicken on the other
- Place the chicken breast-side up on the cool side of the grill
- Close the lid, maintain 350-375°F, and don’t open it for at least 30 minutes
- Start checking temp after about 50 minutes — insert the thermometer in the thickest part of the thigh, not touching bone
- Pull at 165°F in the thigh
- Rest for 15-20 minutes before carving. This step is critical — the juices need time to redistribute
Or Better Yet — Spatchcock It
I’m going to let you in on a secret that transformed the way I grill whole chickens: spatchcocking. It sounds fancy but it just means removing the backbone and flattening the bird. Here’s why it’s superior:
- Cooks in 35-45 minutes instead of 1-1.5 hours
- The entire bird is the same thickness, so it cooks evenly
- More skin exposed to heat = more crispy skin
- More surface area for rub and seasoning
To spatchcock: flip the bird breast-side down, use heavy-duty kitchen shears to cut along both sides of the backbone, remove it (save it for stock!), and press the bird flat. You’ll hear the breastbone crack — that’s normal.
Grill it skin-side up over indirect heat at 375-400°F for about 35-45 minutes. For the last 5 minutes, move it skin-side down over direct heat to crisp up. Absolutely phenomenal.
Common Chicken Grilling Mistakes (And How to Avoid Them)
After twenty-some years of doing this, I’ve seen every mistake in the book. Here are the ones that trip people up the most:
Mistake #1: Cold Chicken on a Hot Grill
Take your chicken out of the fridge 20-30 minutes before grilling. Cold chicken straight from the fridge cooks unevenly — the outside overcooks while the center struggles to come up to temp.
Mistake #2: Not Preheating the Grill
Give your grill a full 10-15 minutes to preheat with the lid closed. This ensures even heat and helps prevent sticking. I see people throw chicken on a lukewarm grill all the time and wonder why it sticks and tears.
Mistake #3: Moving the Chicken Too Much
Put it down. Close the lid. Walk away. Okay, don’t walk too far away — safety first. But stop flipping every two minutes. You’re releasing heat, preventing sear development, and probably tearing the skin. Most cuts need just one flip.
Mistake #4: Saucing Too Early
If your sauce has sugar in it (and most barbecue sauces do), it will burn if applied too early. Wait until the last 5-10 minutes of cooking. Layer it on, let it set, maybe add another coat. That’s how you build a beautiful glaze without a charred mess.
Mistake #5: Cutting Into Chicken to Check Doneness
Every time you cut into a piece of chicken on the grill, juices pour out and your meat gets drier. Use a thermometer. I’ll keep saying it until everyone listens.
Mistake #6: Skipping the Rest
Resting isn’t optional. When chicken comes off a hot grill, the juices are all pushed to the outer edges. Give it 5-10 minutes (15-20 for a whole bird) so the juices redistribute throughout the meat. This is free flavor insurance.
My Favorite Quick Brine for Grilled Chicken
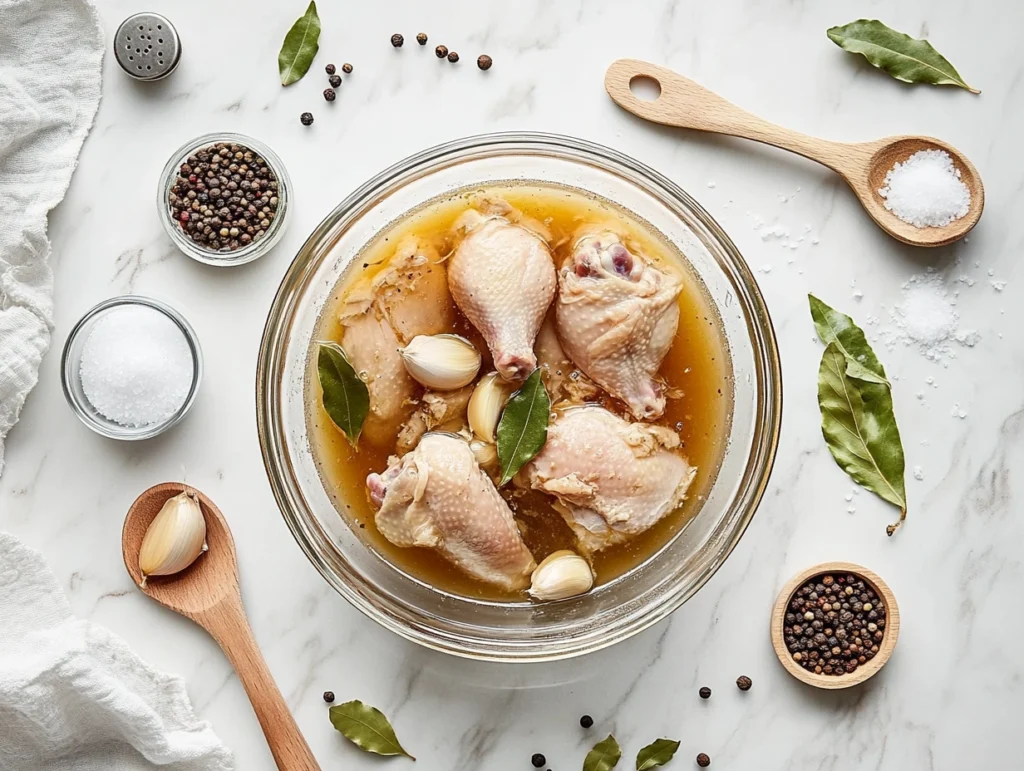
I promised I’d share this, and I’m a man of my word. This brine works on any cut of chicken and takes 30 minutes to 4 hours (don’t go longer than that or the texture gets weird).
Ingredients
- 4 cups water
- ¼ cup kosher salt
- 2 tablespoons brown sugar
- 1 tablespoon black peppercorns
- 3 cloves garlic, smashed
- 2 bay leaves
- 1 cup ice
Instructions
- Heat 2 cups of the water in a saucepan with the salt, sugar, peppercorns, garlic, and bay leaves. Stir until dissolved
- Remove from heat and add remaining 2 cups of cold water plus the ice to cool it down quickly
- Submerge your chicken completely in the brine
- Refrigerate for 30 minutes (boneless cuts) to 4 hours (bone-in or whole birds)
- Remove, rinse briefly, and pat very dry before seasoning and grilling
This brine is dead simple but it makes such a noticeable difference that once you try it, you’ll never skip it again. The salt helps the meat retain moisture during cooking, and the sugar adds just a hint of sweetness that plays beautifully with smoke and char.
Final Thoughts from the Pit
So there you have it — everything I know about how long to cook chicken on a grill, distilled into one guide. I know it’s a lot of information, but here’s the good news: grilling chicken isn’t rocket science. It’s actually pretty simple once you understand the basics.
Remember these three things and you’ll be golden:
- Temperature over time. Get a thermometer and use it every single time.
- Two-zone cooking is your best friend for anything bone-in or thick.
- Rest your meat. Every single time. No exceptions.
I’ve spent twenty years perfecting my craft — burning things, drying things out, serving things that were questionable at best. Every single one of those mistakes taught me something. And now I’m passing that knowledge on to you so you don’t have to make the same ones.
Fire up that grill, get some chicken, and go make something delicious. I believe in you. And hey, if it doesn’t come out perfect the first time? That’s okay. That’s how we all learn. The best pit masters in the world have ruined more chicken than most people have ever cooked. It’s all part of the journey.