How to Make BBQ Chicken Legs in the Oven: Easy Recipe
Alright, gather ’round, friends. Gus here — yeah, the guy who spends most of his waking hours hunched over a smoker in Kansas City, sweating through his apron and arguing with strangers on the internet about whether Carolina mustard sauce counts as “real” barbecue. (It does. Fight me.)
Now, I know what you’re thinking. Gus, you’re a pit master. Why on God’s green earth are you writing about cooking chicken legs in an OVEN? And listen, I get it. Trust me. There was a time when the very idea would’ve made me clutch my pearls — or, more accurately, my pair of well-seasoned tongs. But here’s the thing: I’ve got three kids, a wife who deserves dinner before 9 p.m., and a Kansas City winter that occasionally drops to numbers I refuse to repeat in polite company. Sometimes the smoker stays cold and the oven gets warm. And you know what? I’ve made my peace with that. You should too.
So today I’m gonna walk you through how to make BBQ chicken legs in the oven that are so juicy, so tender, with that sticky-caramelized-lacquered sauce situation going on, that your family is gonna look at you like you’ve been hiding superpowers. Let’s get into it.
Why Chicken Legs Are the Unsung Heroes of BBQ
Real quick, can we talk about drumsticks for a second? Because I feel like they don’t get enough love. Everyone’s out here obsessing over brisket and pork shoulder (don’t get me wrong, I love ’em — I’ve built a career on ’em), but humble chicken legs? They’re cheap, they’re forgiving, and they’ve got that dark meat richness that just drinks up barbecue sauce like it’s been waiting its whole life for the moment.
Here’s a little secret from someone who’s cooked thousands of pounds of chicken: white meat is a diva. One minute too long and it’s sawdust. Drumsticks, though? They’ve got connective tissue and fat that actually want to be cooked low and slow. They’re way harder to mess up. Which is exactly why they’re the perfect candidate for the oven method.
Anyway, enough preamble. Let’s cook.
What You’ll Need
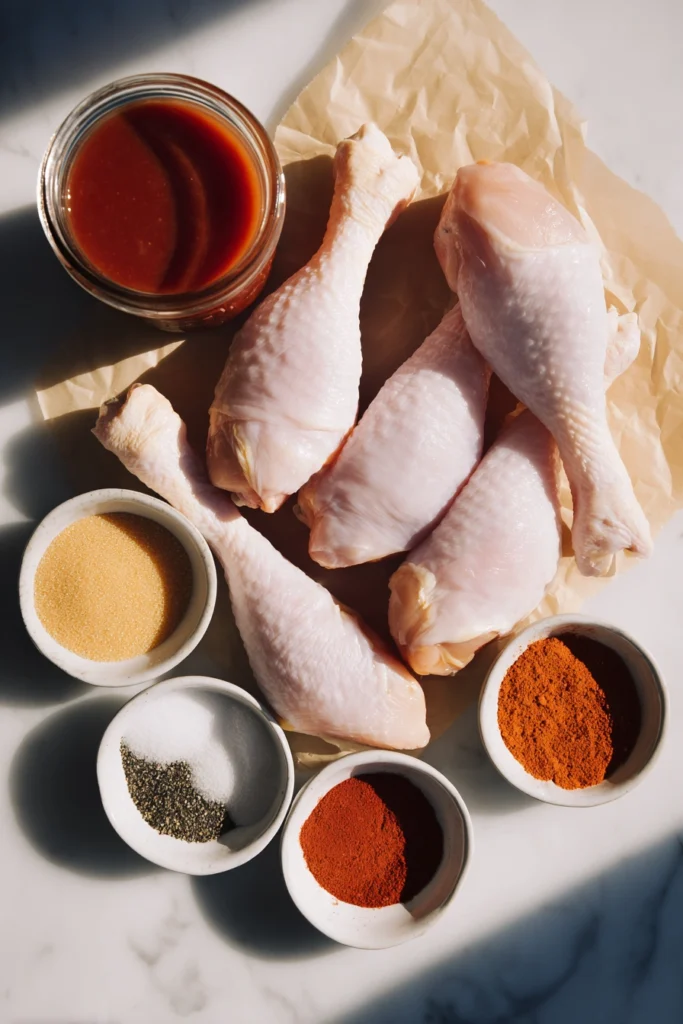
The Chicken
- 8 chicken drumsticks (about 2.5 to 3 pounds) — try to get ones that are roughly the same size so they cook evenly. I learned this the hard way when I served my mother-in-law a drumstick that was basically still clucking. Never again.
The Dry Rub
This is non-negotiable in my house. Saucing without rubbing first is like buttering toast that hasn’t been toasted. Just… why?
| Ingredient | Amount |
|---|---|
| Brown sugar | 2 tablespoons |
| Smoked paprika | 1 tablespoon |
| Kosher salt | 1½ teaspoons |
| Garlic powder | 1 teaspoon |
| Onion powder | 1 teaspoon |
| Black pepper | 1 teaspoon |
| Chili powder | 1 teaspoon |
| Cayenne pepper | ½ teaspoon (or more if you’re brave) |
| Mustard powder | ½ teaspoon |
The Sauce
You can absolutely use store-bought — no shame in my game, I keep a couple bottles in the pantry myself. Sweet Baby Ray’s is fine, Stubb’s is better, and if you can find a local KC sauce, even better. But if you wanna whip up a quick homemade situation:
| Ingredient | Amount |
|---|---|
| Ketchup | 1 cup |
| Apple cider vinegar | 2 tablespoons |
| Brown sugar | 3 tablespoons |
| Worcestershire sauce | 1 tablespoon |
| Dijon mustard | 1 tablespoon |
| Smoked paprika | 1 teaspoon |
| Garlic powder | ½ teaspoon |
| A dash of hot sauce | because we’re not cowards |
Whisk it all together in a small saucepan, simmer for about 5 minutes, and boom — you’ve got sauce that’ll make grocery store stuff weep with envy.
How to Make BBQ Chicken Legs in the Oven: Step by Step
Step 1: Prep Your Chicken (Don’t Skip the Pat-Down)
Take your drumsticks out of the fridge about 20-30 minutes before cooking. Cold chicken hitting a hot oven is a recipe for uneven cooking, and we don’t do uneven in this house.
Now grab some paper towels and pat those legs dry. I mean really dry. Like you’re trying to absorb their secrets. This is the single biggest mistake people make with oven chicken — they leave it wet, then wonder why the skin turns out flabby and sad. Dry skin equals crispy skin. Write that on your hand.
Step 2: Season Like You Mean It
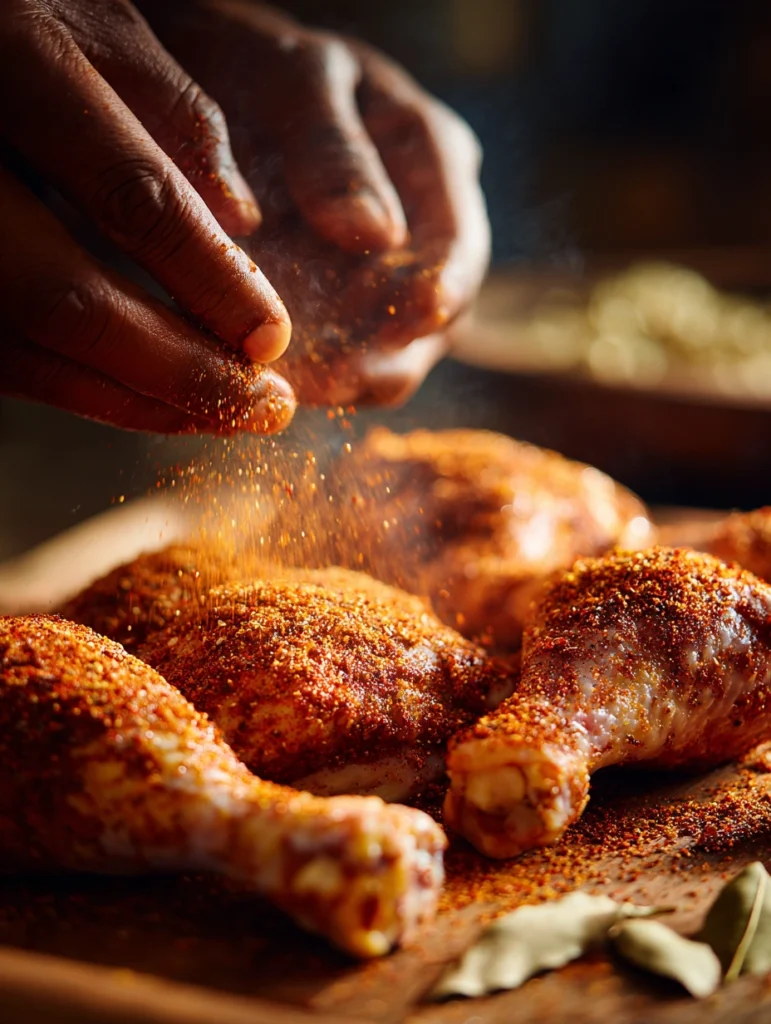
Mix all your dry rub ingredients in a bowl. Drizzle the drumsticks with about a tablespoon of olive oil (this helps the rub stick AND helps the skin crisp), then go to town with that rub. Get under whatever skin you can lift, get into the crevices, get everywhere. Use about three-quarters of the rub now and save a little for later — you’ll see why.
Here’s a pro move: if you’ve got the time, season the chicken and let it sit uncovered in the fridge for an hour or two. Or even overnight. The salt does its thing, the skin dries out even more, and the end result is just next level. But if you’re hungry now, no judgment. Press on.
Step 3: Set Up for Success
Preheat your oven to 425°F. Hot oven, hot oven, hot oven. People are always trying to bake chicken at like 350° and then asking me why the skin isn’t crispy. Because you’re poaching it, my friend! 425 is the magic number.
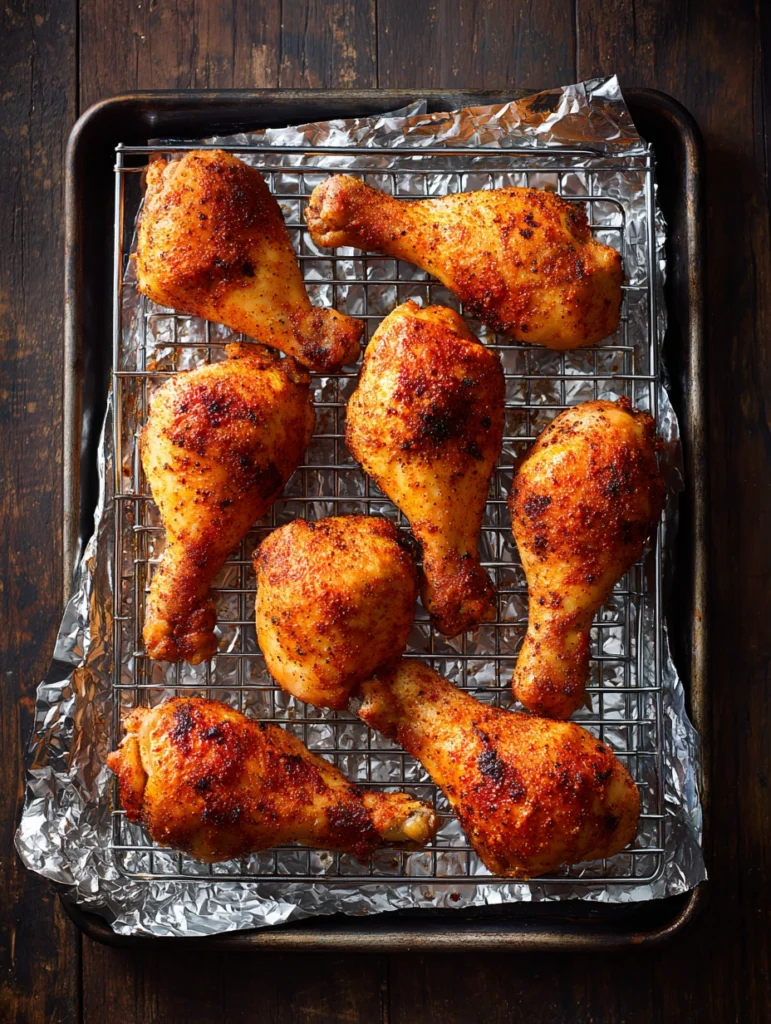
Line a sheet pan with foil (your future self will thank you when cleanup comes around — that sauce is gonna caramelize onto everything it touches). Then — and this part matters — put a wire rack on top of that sheet pan. The rack lets air circulate all the way around the drumsticks so they cook evenly and the skin gets crispy on the bottom too. No rack, no glory.
Arrange the drumsticks on the rack with a little space between each one. Crowding equals steaming, and steaming equals soggy skin, and soggy skin equals me showing up at your house disappointed.
Step 4: The First Bake (Naked Chicken Phase)
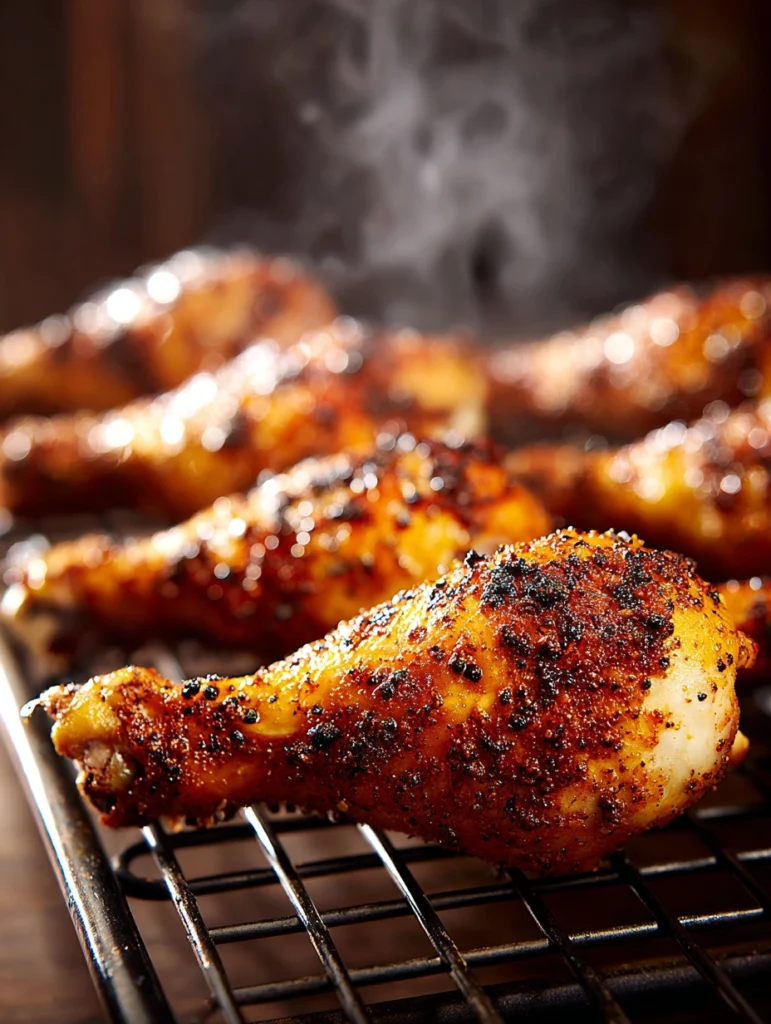
Slide that pan into the oven and bake for 35 minutes. Resist the urge to open the door every 5 minutes. I know it’s tempting. Go fold some laundry. Yell at your kids. Read a chapter of something. Just leave the chicken alone.
What’s happening in there is magic — the rub is forming a beautiful bark, the fat is rendering, the skin is getting crispy. Patience, grasshopper.
Step 5: Sauce Em Up
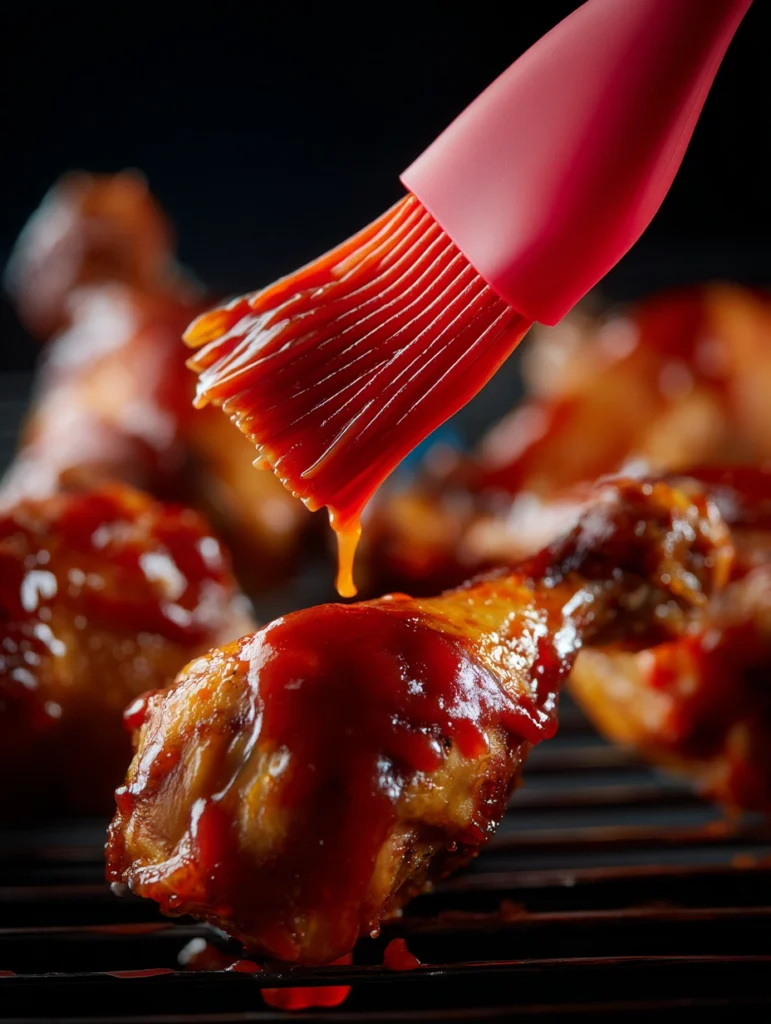
Pull the pan out. Brush the drumsticks generously with your BBQ sauce — top, sides, everywhere your brush can reach. Sprinkle that little bit of leftover rub on top (told you we’d come back to it — it adds this gorgeous textural thing on top of the sauce, trust me).
Pop them back in for another 10 minutes.
Step 6: The Glaze Layer (Optional But Highly Encouraged)
Pull ’em out one more time, brush with another layer of sauce, and either:
- Option A: Bake for 5 more minutes at 425°F. Safe. Reliable. Good.
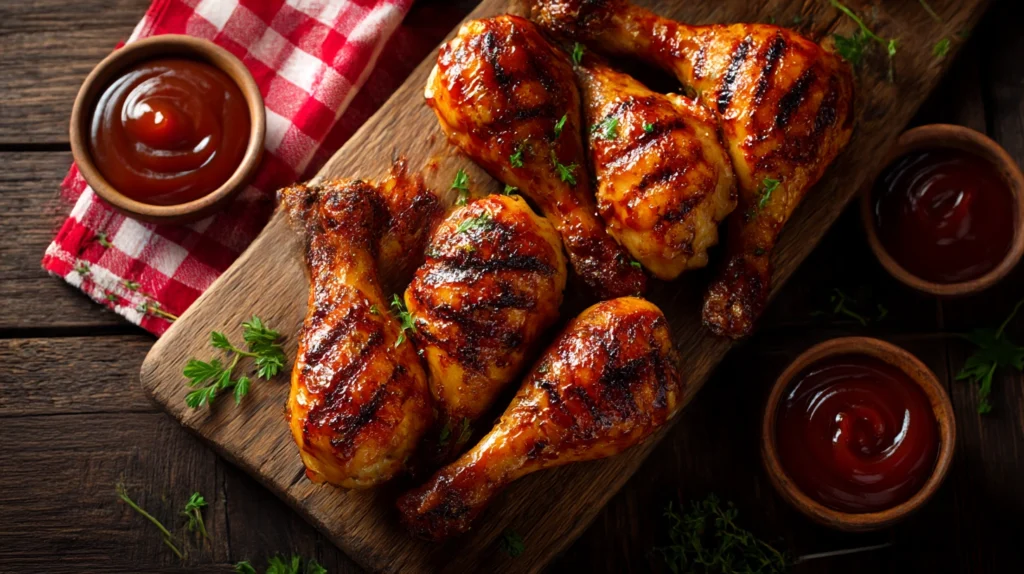
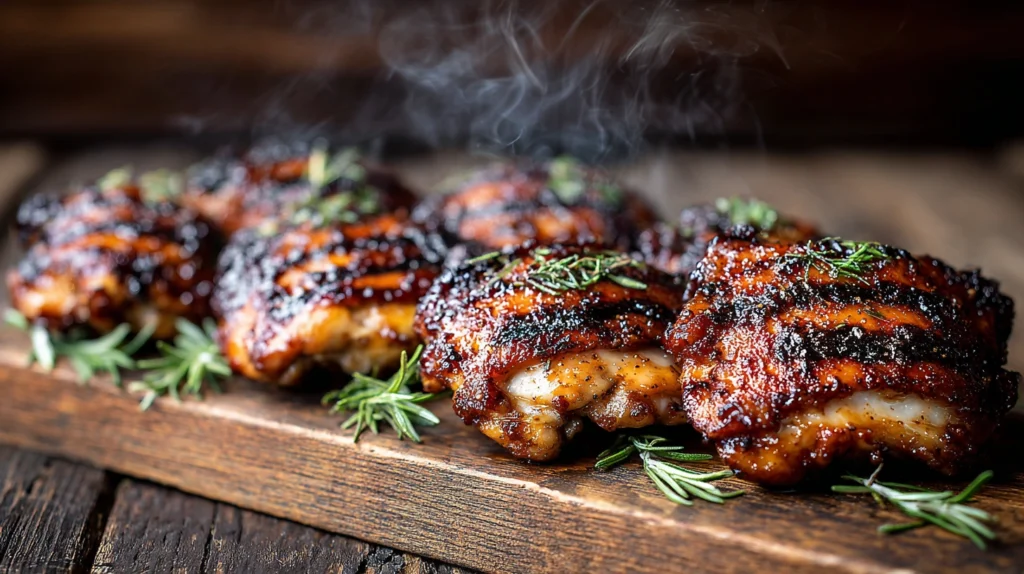
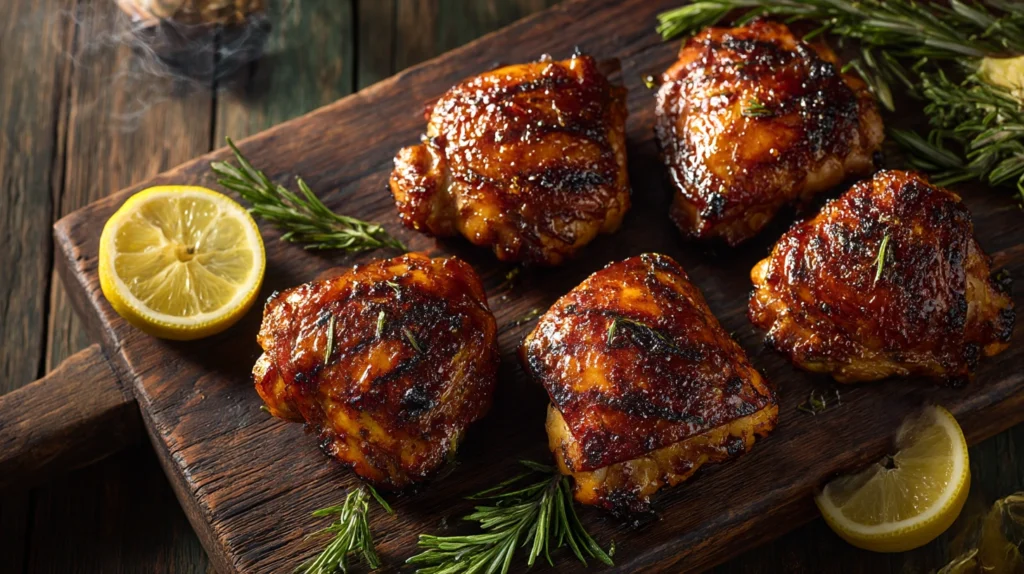
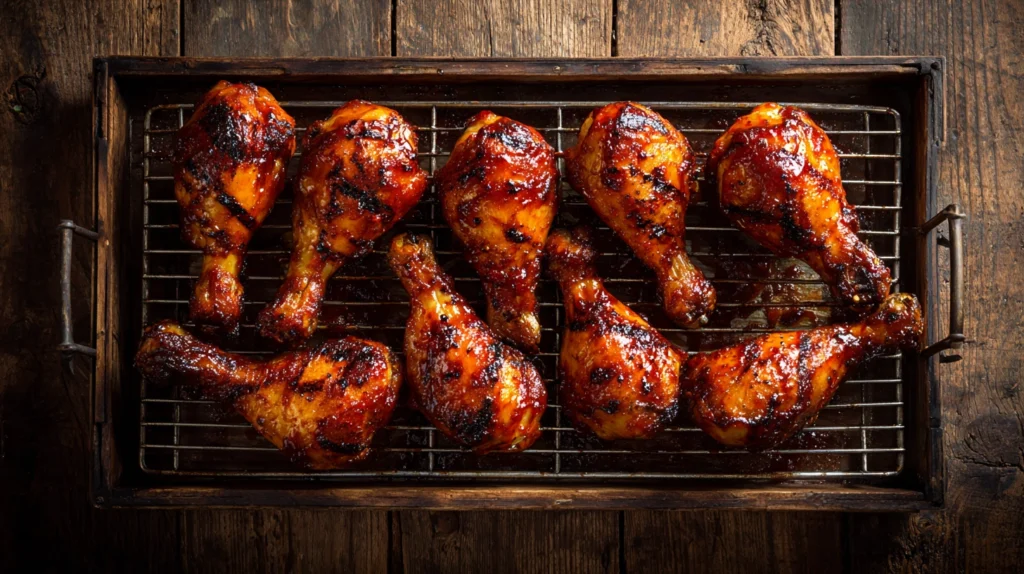
- Option B: Crank your broiler on HIGH and broil for 2-4 minutes. Risky. Spectacular. The sauce gets that lacquered, sticky, slightly-charred-in-spots look that screams real barbecue.
I always go Option B. But I also stand right there watching through the oven window like I’m guarding the crown jewels, because broilers go from “perfect” to “carbon” in about 30 seconds. You’ve been warned.
Step 7: Rest. Yes, Really.
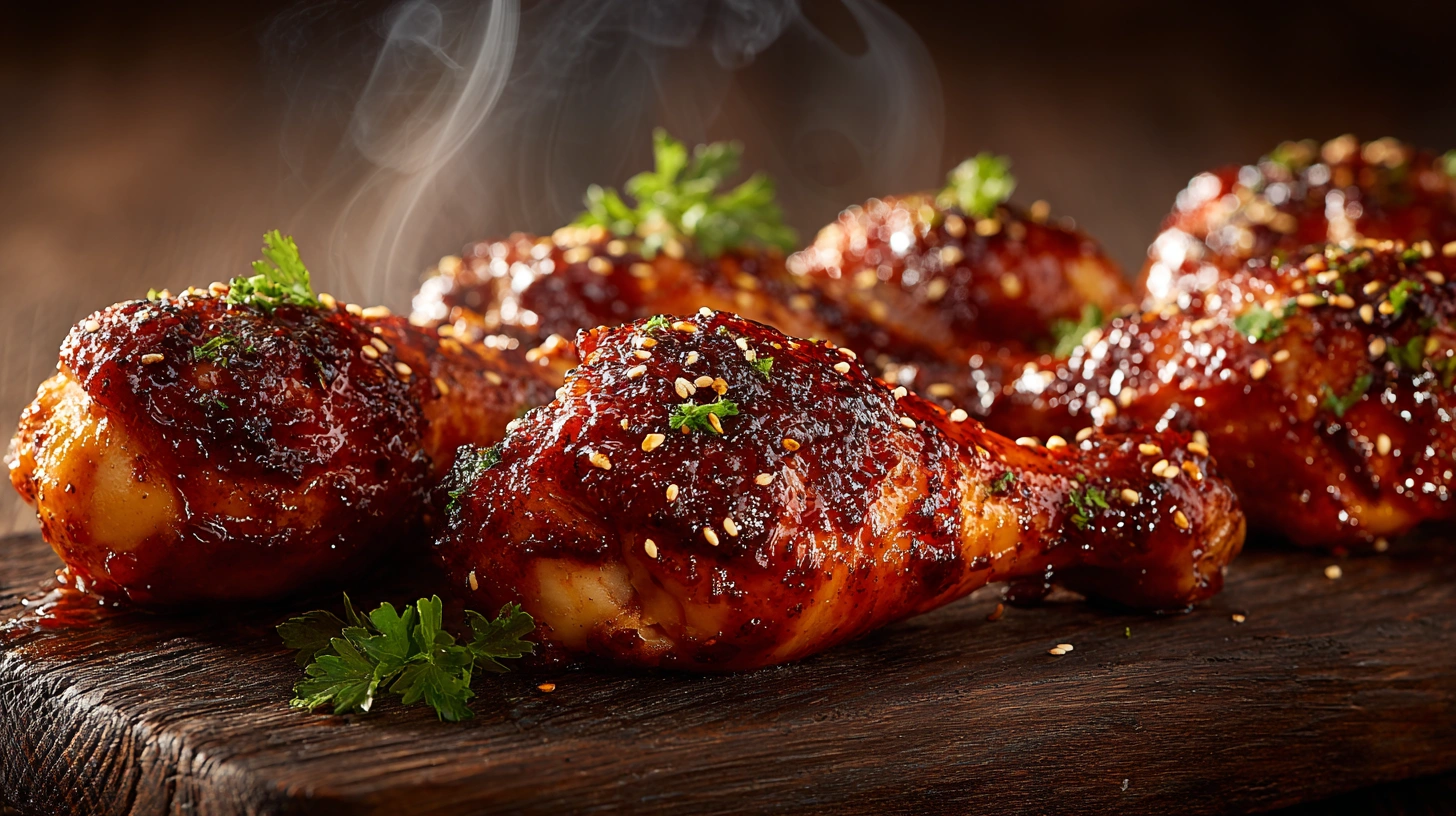
Let those drumsticks rest for about 5 minutes before you serve them. I know they smell incredible. I know everyone’s hovering. Tell them to back off. Resting redistributes the juices, and biting into a properly rested drumstick versus one that just came out of the oven is the difference between “good” and “why have I never had chicken this juicy before.”
Internal temp should be at least 175°F in the thickest part. I know the food safety charts say 165° for chicken, and that’s the minimum, but here’s a little known truth — dark meat is way better at 175-185°. The connective tissue breaks down, the texture goes from rubbery to tender. Trust me on this one.
A Few Random Tips From My Years of Doing This
On chicken quality: If you can, spring for air-chilled chicken. It’s drier from the start, which means crispier skin. Makes a real difference.
On the smoke flavor problem: Look, it’s an oven. It’s not gonna taste like it came off my offset smoker — nothing does. But you can fake it pretty convincingly with smoked paprika in the rub and a chipotle pepper or two blended into your sauce. Some folks add a few drops of liquid smoke. I won’t tell anyone if you don’t.
On serving: Coleslaw. Cornbread. Baked beans. Pickles. Maybe some grilled corn if it’s summer. This is not a salad situation, folks. Lean in.
On reheating leftovers: If you somehow have leftovers (suspicious, but okay), reheat them in the oven at 350° for about 10 minutes. Microwave will turn that beautiful skin into something resembling a wet paper bag. Don’t do it.
The Bottom Line
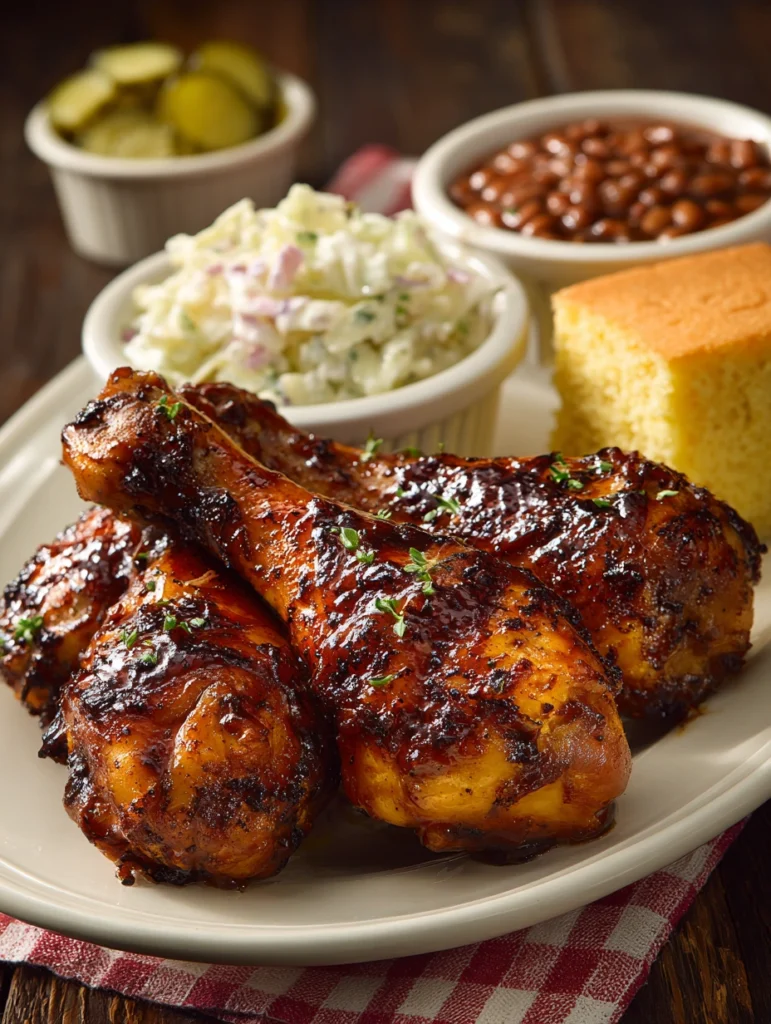
Look, I’ll always be a smoker guy. There’s something almost spiritual about babysitting a brisket for 14 hours, watching the smoke curl up into a Kansas City sunrise. But this oven method? It’s saved me more weeknights than I can count. It’s how I feed my family on Tuesdays. It’s how I introduced my youngest to real barbecue flavor before she was old enough to appreciate the smoker. And honestly, when you nail this recipe, you’re gonna be shocked at how close it gets you to the real deal.
So preheat that oven. Pat those drumsticks dry. Don’t skip the rack. Don’t be afraid of the broiler. And for the love of all that is holy, let them rest.
You’ve got this, friend. Now go make some chicken that’ll make your kitchen smell like a Kansas City backyard in July. And when your family asks you where you learned to cook like that, you just smile and tell ’em a guy named Gus said hi.