How to BBQ Chicken Thighs: Easy Step-by-Step Guide
Learn how to BBQ chicken thighs to juicy, smoky perfection. A beginner-friendly guide covering prep, seasoning, grill temps, and cook times for the best results every time.
Let me tell you something—if you’re still defaulting to chicken breasts every time you fire up the grill, you’re leaving so much flavor on the table. And I say that with love, because I was that person for the first couple years I was learning how to bbq chicken thighs properly. I’d reach for the breast every single time, thinking it was the “healthier” or “better” cut. Boy, was I wrong.
Chicken thighs are, hands down, the most forgiving and flavorful cut of chicken you can throw on a grill. They’ve got more fat, more connective tissue, and that means more moisture and more forgiveness if your timing isn’t picture-perfect. And here’s the thing—once you nail the technique, you’ll wonder why you ever bothered with anything else.
I’ve been grilling professionally for over twenty years here in Kansas City, and I’ve probably cooked more chicken thighs than I can count. I’ve served them at competitions, at my restaurant, and at more backyard cookouts than my wife cares to remember. So in my experience, this is the single best cut for anyone learning the ropes. Let me walk you through everything you need to know.
Why Chicken Thighs Are the King of the Grill
Before we get into the how-to, I want to talk about why chicken thighs deserve the crown. See, most beginners are terrified of drying out their chicken on the grill. And with breast meat, that fear is totally justified—overcook it by even a couple minutes and you’ve got something that tastes like seasoned cardboard. We’ve all been there.
Thighs are different. That extra fat content acts like a built-in insurance policy. They stay juicy and tender even if you go a few minutes long. And because dark meat has more myoglobin—that’s the protein that gives it that deeper color—it develops a richer, more complex flavor when exposed to smoke and direct heat. It’s basically science working in your favor for once.
Quick truth from 20+ years of grilling: I’ve seen beginner grillers produce better chicken thighs on their first try than seasoned cooks produce with breasts. The thigh just wants to be delicious. You almost have to try to mess it up.
Bone-In, Skin-On vs. Boneless, Skinless
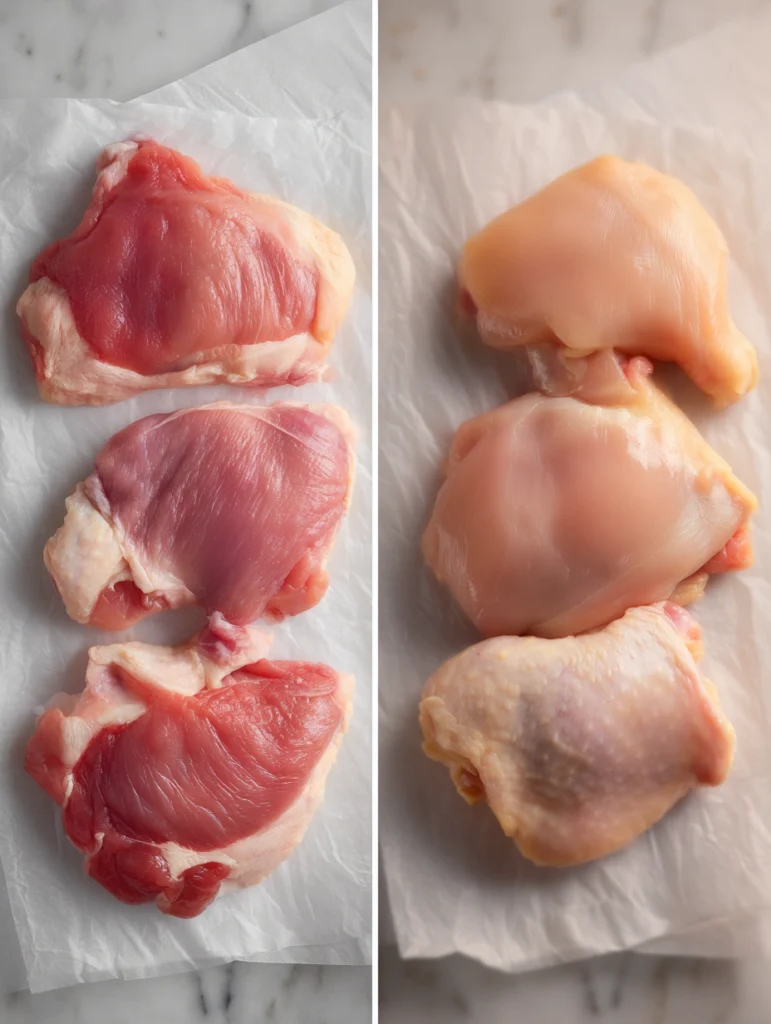
Now here’s a fork in the road that trips people up. Which type should you buy? Let me break it down honestly:
| Feature | Bone-In, Skin-On | Boneless, Skinless |
|---|---|---|
| Flavor | Richer, deeper flavor from the bone | Good, but slightly less complex |
| Texture | Crispy skin + juicy meat | Tender, even texture throughout |
| Cook Time | 35–45 minutes | 20–28 minutes |
| Difficulty | Slightly harder (needs temp check) | Very beginner-friendly |
| Best For | Impressive main course, cookouts | Quick dinners, meal prep, sandwiches |
My honest recommendation? If this is your first rodeo learning how to bbq chicken thighs, start with bone-in, skin-on. I know that sounds counterintuitive—why not go with the “easier” boneless option? Because that crispy skin is what’s going to make you fall in love with grilling thighs. It’s the payoff. It’s the reward. And I’m going to show you exactly how to nail it.
Prepping Your Chicken Thighs Like a Pro
Alright, let’s get into the actual process. Prep is where most people rush through and then wonder why their chicken doesn’t taste as good as what they get at a restaurant. Slow down here—this part matters more than you think.
Trimming
If you bought bone-in, skin-on thighs, take a second to trim off any excess skin that’s hanging over the edges or any big globs of fat on the underside. You don’t want to remove all the fat—that’s flavor—but those dangling bits will just burn and turn bitter. I keep a pair of sharp kitchen shears next to my cutting board for this. Way easier than a knife, trust me. I learned that the hard way after nicking my thumb trying to trim thighs with a chef’s knife at 6 AM before a competition. Not my finest moment.
Drying
This step is critical and it takes about 30 seconds. Pat every single thigh dry with paper towels. Both sides. I mean really get in there and blot all that moisture off. Why? Because dry skin = crispy skin. Wet skin = rubbery, flabby skin that nobody wants. It’s such a simple thing, but it makes a massive difference.
Grill Master Pro Tip
For the absolute crispiest skin, set your trimmed and seasoned thighs on a wire rack over a sheet pan and let them sit uncovered in the fridge for 2–4 hours (or even overnight). The cold, dry air of the refrigerator pulls moisture from the surface of the skin. Competition-level results, minimal effort.
The Seasoning: Keep It Simple, Make It Count
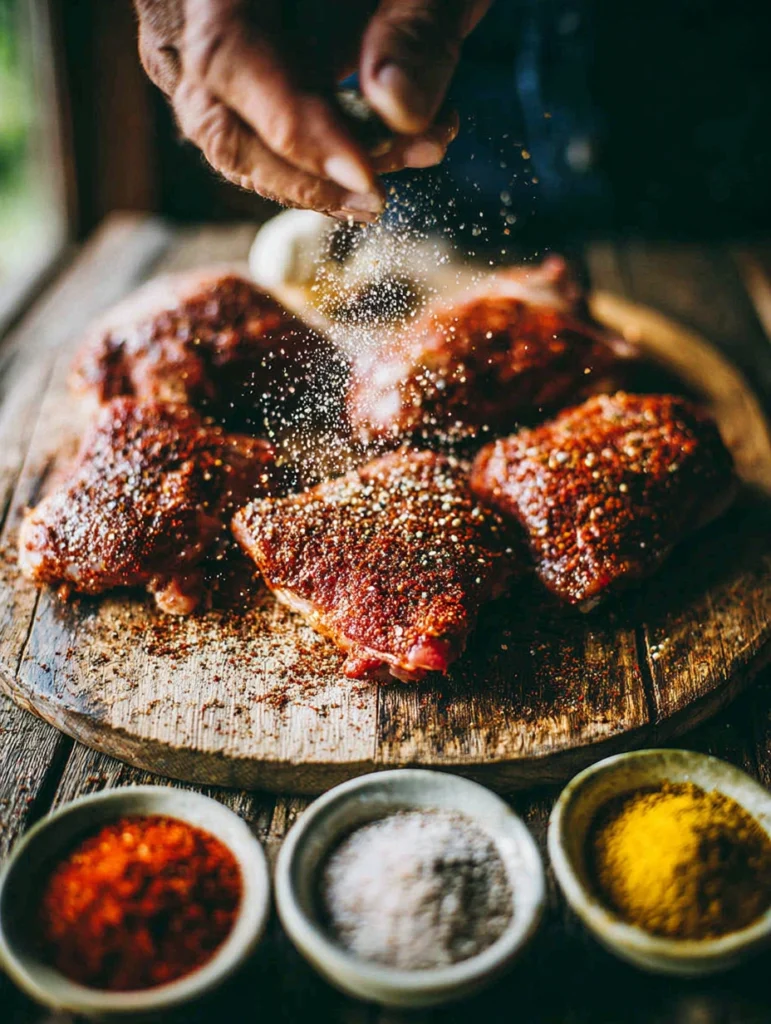
I could give you a rub recipe with 47 ingredients that I use at competitions, but honestly? For everyday grilling, simplicity is your best friend. Here’s my go-to rub that I’ve been using for years. It works every. Single. Time.
Gus’s All-Purpose Chicken Thigh Rub
Ingredients
- 2 tablespoons smoked paprika
- 1 tablespoon garlic powder
- 1 tablespoon onion powder
- 1 tablespoon brown sugar (light or dark)
- 1 teaspoon freshly ground black pepper
- 1 teaspoon kosher salt
- ½ teaspoon cayenne pepper (optional, for heat)
- ½ teaspoon dried thyme
Mix everything together in a small bowl. This makes enough for about 8 thighs. Store leftovers in an airtight jar—it keeps for months.
Drizzle just a little bit of olive oil over your dried thighs—just enough to give the rub something to stick to—then coat them generously on all sides. And I mean generously. Don’t be shy. You want a nice even coating, pressing the rub into the meat so it really adheres. Anyway, some folks like to let the seasoned thighs sit for 30 minutes to an hour at room temperature before grilling. I’m one of those folks. It helps the meat cook more evenly and lets those spices really get acquainted with the chicken.
Setting Up Your Grill: The Two-Zone Method
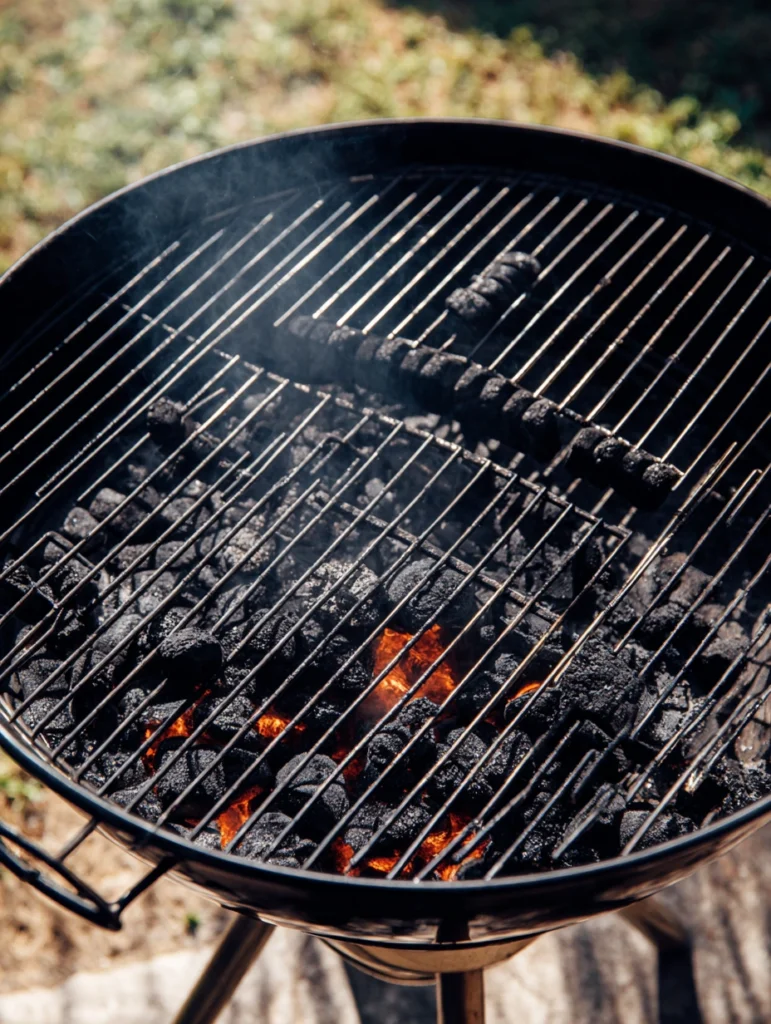
Okay, this is where the magic happens. And if you take away just one thing from this entire article, let it be this: use a two-zone fire. I cannot stress this enough.
A two-zone setup means you’ve got one side of your grill running hot (direct heat) and the other side with no coals or burners off (indirect heat). This gives you total control. You cook the thighs on the indirect side to get them up to temperature without burning, and then you move them to the hot side at the end to crisp up the skin. It’s foolproof.
For Charcoal Grills
Light a chimney of charcoal—about 3/4 full for thighs—and dump all the coals on one half of the grill. Leave the other half completely empty. Put the cooking grate on and close the lid to let it heat up for about 5 minutes.
For Gas Grills
Turn one side of your burners to medium-high (about 400–425°F) and leave the other side completely off. Close the lid and let it preheat for 10–15 minutes. If you’ve got a three-burner grill, light the two outside burners and leave the middle off—that’s actually my preferred setup for gas.
Target Temperatures
| Zone | Temperature | Purpose |
|---|---|---|
| Indirect Side | 325–350°F | Cooking thighs through gently |
| Direct Side | 450–500°F | Crisping skin & adding char |
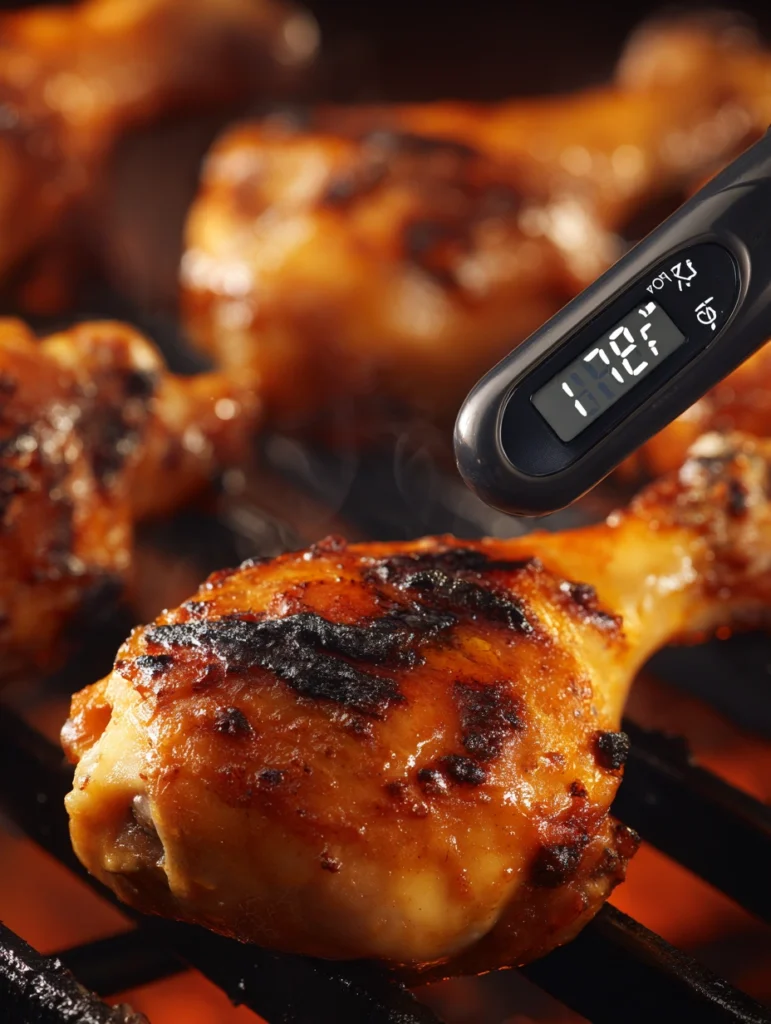
| Internal Chicken Temp | 185–190°F | Done—juicy with rendered fat |
Wait, 185°F? I know, I know—the USDA says chicken is safe at 165°F. And that’s true. But with thighs specifically, taking them up to 185–190°F allows all that connective tissue and fat to fully render, giving you that melt-in-your-mouth texture. At 165°F, thighs can still be a bit chewy and rubbery. Trust me on this one.
Grilling Your Chicken Thighs: Step by Step
Alright, the grill is hot, the chicken is seasoned, you’ve got your tongs in hand—let’s do this thing.
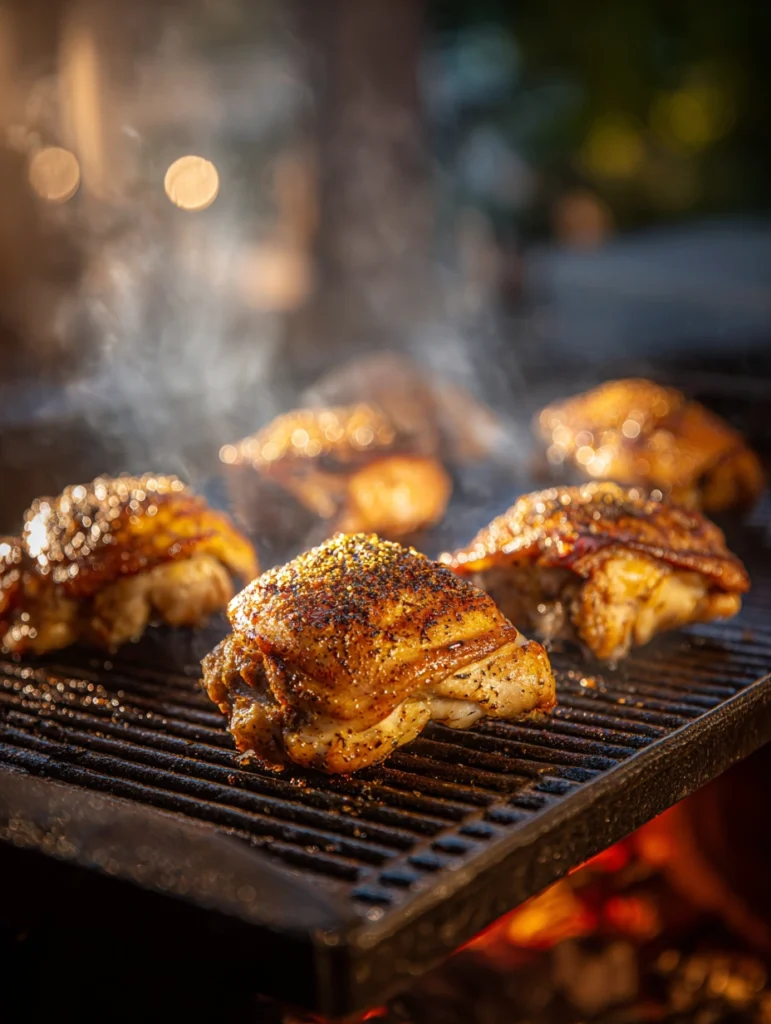
Place thighs on the indirect side, skin-side up. Close the lid. You’re going to let these cook for about 20–25 minutes without touching them. I know it’s tempting to peek. Don’t. Every time you open that lid, you lose heat and add time. As I like to say: “If you’re lookin’, you ain’t cookin’.”
Flip the thighs so they’re now skin-side down on the indirect side. Cook for another 10–15 minutes with the lid closed. You’re looking for an internal temperature of around 170–175°F at this point.
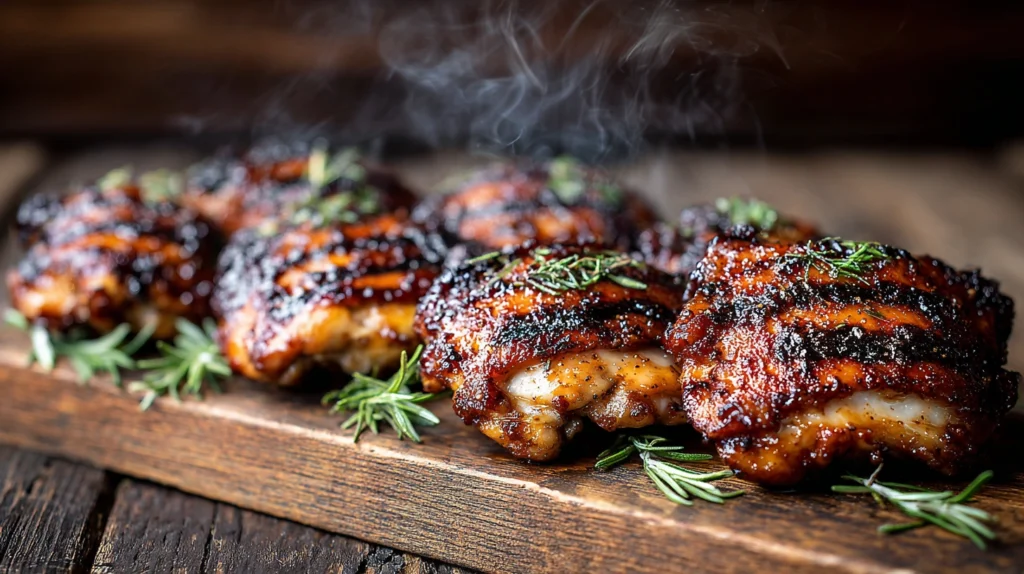
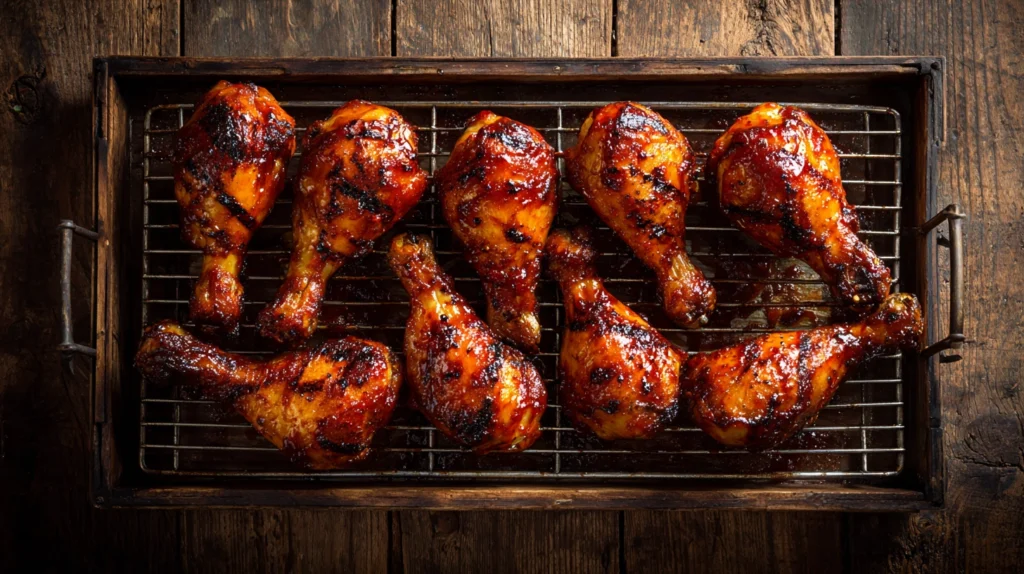
Move the thighs to the direct heat side, skin-side down. Now we’re crisping. This part goes fast—about 3–5 minutes. Watch them carefully because the sugar in your rub and the chicken fat can cause flare-ups. Keep your tongs ready to move pieces if the flames get too aggressive.
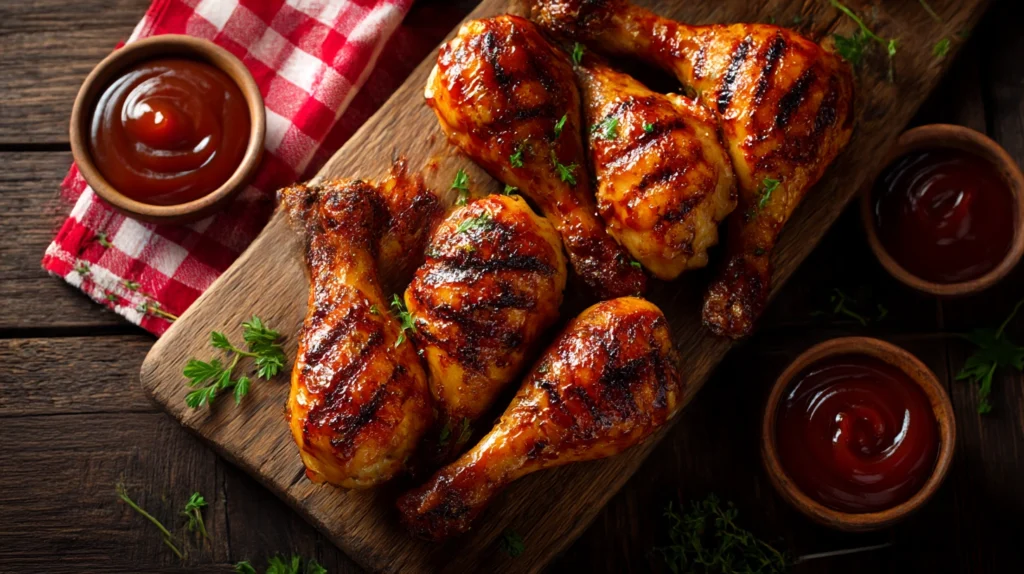
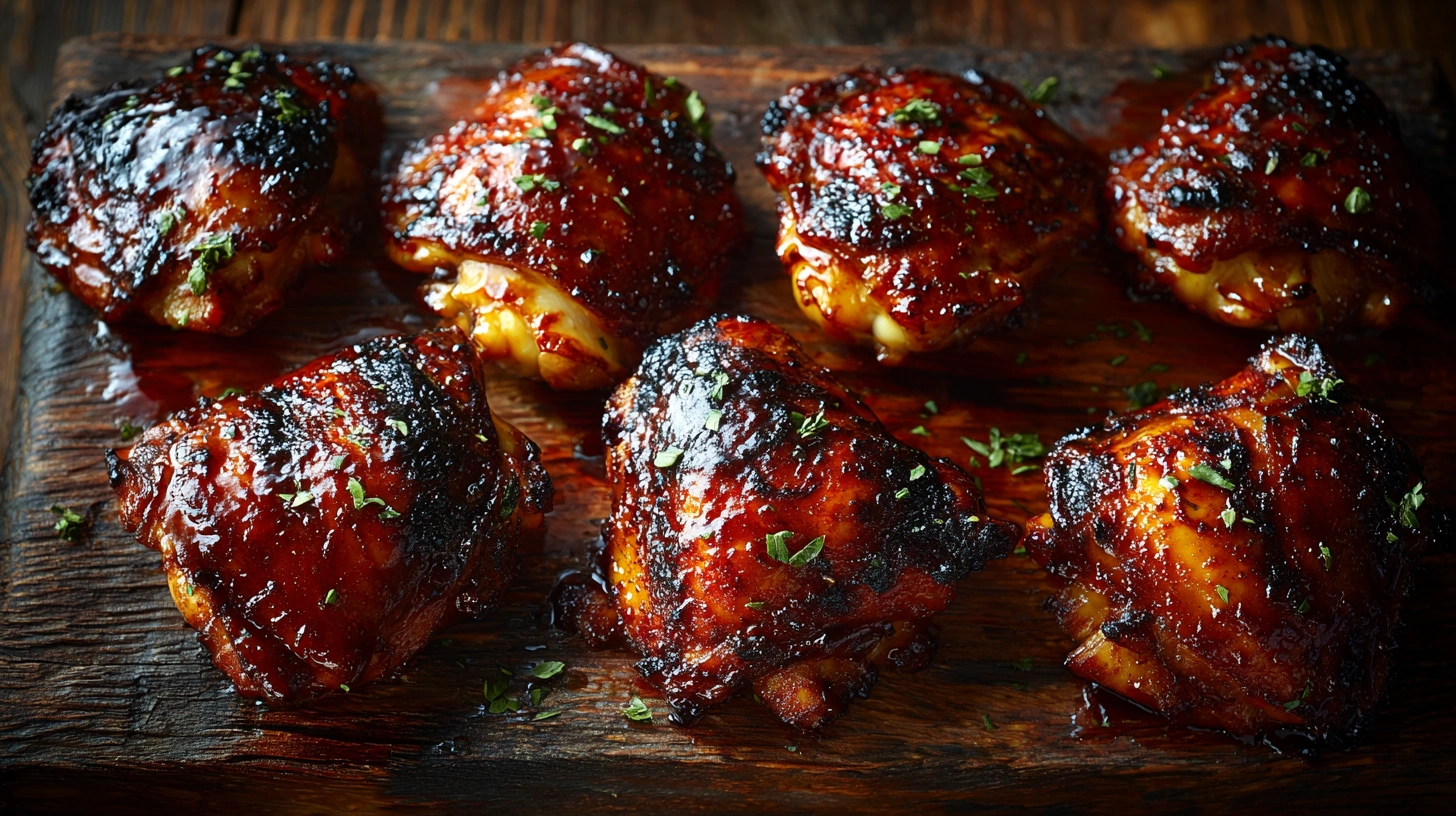
Flip once more on the direct side. Give the other side about 2–3 minutes of direct heat. If you’re adding BBQ sauce, now’s the time—brush it on during these last few minutes so it caramelizes without burning.
Check the temperature. Pull the thighs when they hit 185–190°F in the thickest part of the meat, away from the bone. Transfer them to a cutting board or platter and let them rest for 5 minutes. This lets the juices redistribute so they don’t all run out when you cut in.
And that’s it. That’s how to BBQ chicken thighs. The whole process takes maybe 40–45 minutes from the time the chicken hits the grate, and most of that time you’re just standing there with a cold drink enjoying the smell. That’s what I call a win.
Common Mistakes (And How to Dodge Them)
Over the years, I’ve watched a lot of people grill chicken thighs. And I’ve seen the same handful of mistakes come up again and again. Here’s what to watch out for:
Cooking Over Only Direct Heat
This is the number one mistake I see. People crank the grill to high and throw the thighs right over the hottest part. What happens? The outside chars and burns while the inside is still raw near the bone. The two-zone method exists specifically to prevent this. Use it.
Not Checking Internal Temperature
Please, for the love of all things smoked and seared, get yourself an instant-read thermometer. They cost like fifteen bucks and they’ll transform your grilling. Guessing is how you end up with either raw chicken or a dried-out hockey puck. The Thermoworks ThermoPop is my budget pick—it reads in about 3 seconds and it’s been riding in my apron pocket for years.
Saucing Too Early
BBQ sauce has sugar. Sugar burns. If you slather sauce on your thighs at the beginning of the cook, you’re going to end up with a blackened, acrid mess that tastes like a campfire reject. Sauce goes on in the last 5–8 minutes, max. Just enough time to get tacky and caramelized, not enough time to turn into charcoal.
Not Letting the Meat Rest
I get it—the chicken comes off the grill looking gorgeous and you want to dig in immediately. But give it 5 minutes. Just 5 minutes. The fibers relax, the juices settle back into the meat, and every bite will be noticeably juicier. I usually use this time to throw some quick vegetables on the hot side of the grill—halved zucchini, corn, peppers—so nothing goes to waste.
Taking It to the Next Level
Once you’ve got the basic technique down, there’s a whole world of flavor possibilities to explore. Here are a few of my favorite variations that have won me compliments (and a couple of trophies, if I’m being honest):
Kansas City Sweet Heat
Use my base rub but double the brown sugar and add a full teaspoon of cayenne. During the last 5 minutes, glaze with a thick KC-style sauce—the kind that’s sweet, tangy, and just a little spicy. This is what I grew up eating and it still makes me happy every single time.
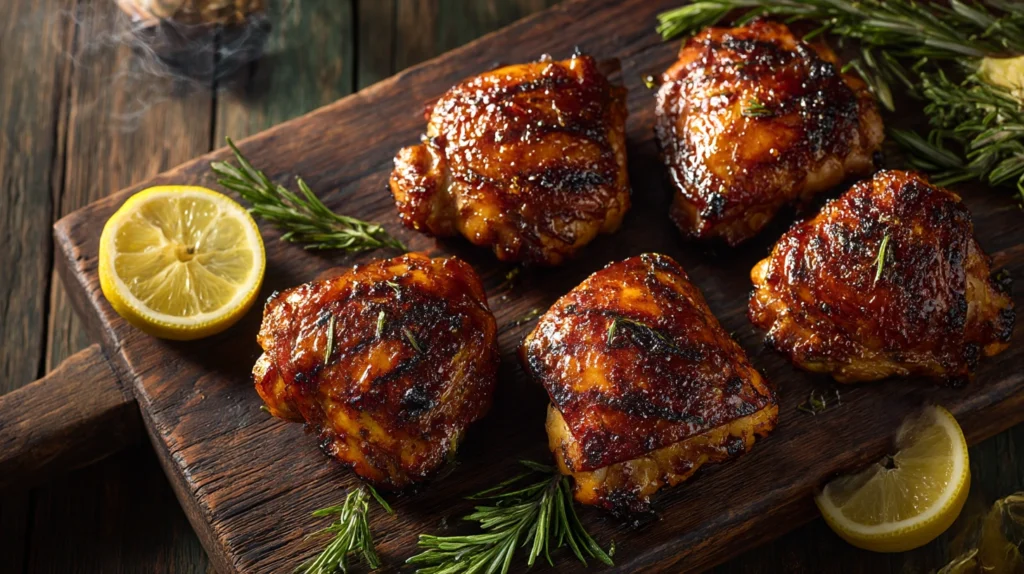
Lemon-Herb Mediterranean Style
Skip the rub entirely. Instead, marinate your thighs for 2–4 hours in a mixture of olive oil, lemon juice, minced garlic, dried oregano, and a little bit of smoked paprika. Grill using the same two-zone method. Finish with a squeeze of fresh lemon and some crumbled feta. It’s lighter, brighter, and perfect for summer.
Asian-Inspired Teriyaki Glaze
Marinate the thighs in a mix of soy sauce, rice vinegar, sesame oil, ginger, and a bit of honey for at least an hour. Grill as usual, and brush with extra teriyaki glaze during the last few minutes. Hit them with some sesame seeds and sliced scallions right when they come off the grill. My kids absolutely demolish these.
Quick Reference: BBQ Chicken Thigh Timing Guide
| Cut | Grill Temp | Indirect Time | Direct/Crisp Time | Target Internal Temp |
|---|---|---|---|---|
| Bone-in, skin-on | 325–350°F indirect | 30–35 min | 5–8 min | 185–190°F |
| Boneless, skinless | 350–375°F indirect | 15–20 min | 4–6 min | 175–180°F |
| Boneless, skin-on | 325–350°F indirect | 20–25 min | 5–7 min | 180–185°F |
A Note About Altitude & Weather
If you’re grilling in cold weather or at high altitude, everything takes longer. Wind is the invisible enemy of consistent grill temps. Position your grill so the wind hits the back, not the vents. And in winter, I add an extra 5–10 minutes to my cook times and check temp more frequently. Don’t just set a timer and walk away—pay attention to what the chicken is telling you.
What to Serve Alongside
No chicken thigh stands alone. Here are some of my go-to sides that complement BBQ chicken thighs beautifully, and most of them can be prepped while the chicken is on the grill:
Classic coleslaw with a vinegar-based dressing cuts through the richness of the dark meat perfectly. Grilled corn on the cob with butter and chili-lime seasoning is always a crowd favorite. Baked beans—slow-cooked if you’ve got time, canned-and-doctored-up if you don’t (no judgment here). And honestly, a simple green salad with a bright vinaigrette is all you need to round things out. Keep it simple so the chicken stays the star.
Now It’s Your Turn
Look, learning how to BBQ chicken thighs isn’t complicated. It’s one of those rare things in cooking where the technique is simple but the results taste like you spent all day in the kitchen. Set up your two zones, season boldly, respect the temperature, and let the grill do its thing. You’ve got this. I believe in you—now go make something delicious.