how long to cook bbq chicken legs in oven Easy Guide
Look, I’m gonna be honest with you — I’ve been a pit master in Kansas City for over two decades, and even I don’t always fire up the smoker. Sometimes it’s Tuesday night, the kids are hungry, and you just need a tray of sticky, caramelized BBQ chicken legs coming out of a screaming hot oven. And you know what? There’s absolutely no shame in that game.
So if you’ve ever Googled “how long to cook BBQ chicken legs in oven” and gotten a dozen different answers, you’re not alone. I’m Gus Johnson — friends call me the Grill Master, my wife calls me other things when I track smoker ash through the house — and today I’m going to settle this once and for all.
Here’s the thing… oven-baked BBQ chicken legs can be incredible if you nail the time and temperature. Get it wrong, and you’re looking at either rubbery skin or chicken so dry it could double as a chew toy. Neither of those is a good look at the dinner table.
The Short Answer: Time and Temperature at a Glance
Before we get into the weeds (and trust me, we’re going deep), here’s the quick-hit version for those of you who just need numbers:
| Oven Temperature | Cook Time | Best For |
|---|---|---|
| 375°F (190°C) | 40–50 minutes | Tender, juicy meat with moderate crispiness |
| 400°F (205°C) | 35–45 minutes | Good balance of crispy skin and juicy interior |
| 425°F (220°C) | 30–40 minutes | Maximum crispiness, slightly faster cook |
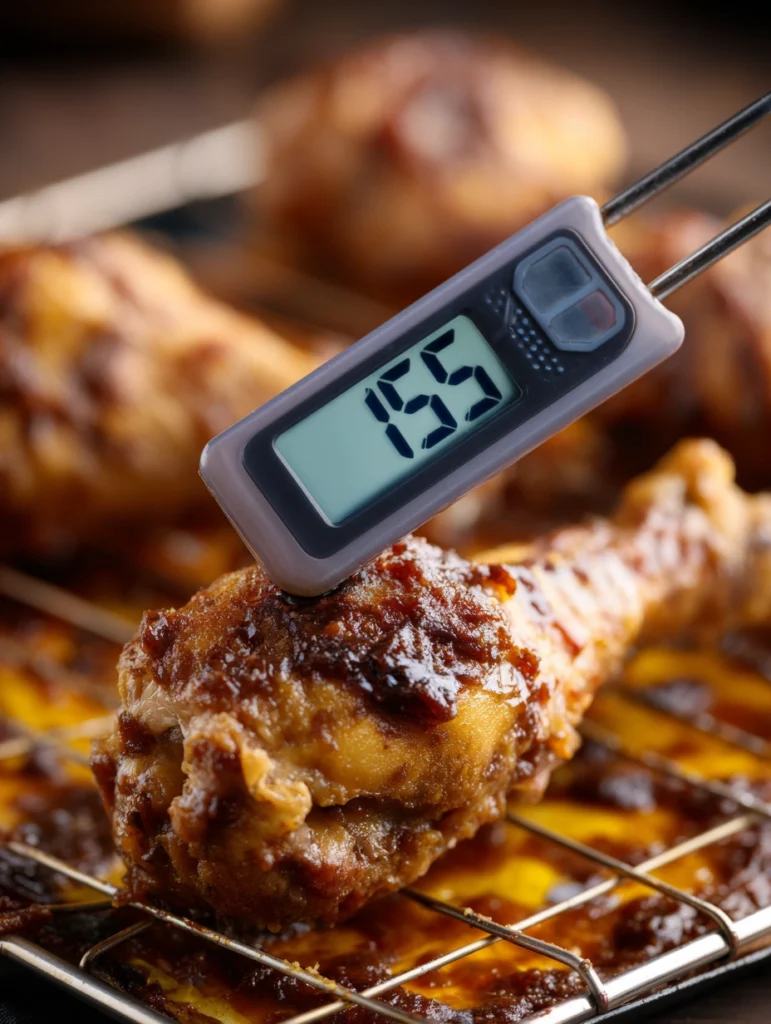
The golden rule: Your chicken legs are done when the internal temperature hits 165°F (74°C) at the thickest part, not touching the bone. I personally pull mine at 170–175°F because dark meat actually tastes better with a little extra cooking — the collagen breaks down and everything gets silky. That’s a pit master secret most food blogs won’t tell you.
Now, if you want to really understand why these numbers matter and how to get restaurant-quality results every single time, stick around. I’ve got stories, tips, and a killer recipe coming your way.
Why Chicken Legs Are the Unsung Hero of Weeknight Cooking
They’re Practically Foolproof
I remember years ago, early in my culinary school days, I was obsessing over chicken breast. Trying to get it juicy, trying to keep it from drying out. My instructor, Chef Ramona — tough woman, could debone a whole chicken blindfolded — she looked at me struggling and said, “Johnson, why are you fighting the hardest cut when the easiest one is sitting right there?”
She pointed at a pile of drumsticks.
And she was right. Chicken legs (drumsticks specifically) are dark meat, which means more fat, more connective tissue, and way more forgiveness. You can overcook a chicken leg by five minutes and it’ll still be good. Try that with a chicken breast and you’ve got sandpaper.
They’re Budget-Friendly
At any grocery store, drumsticks are one of the cheapest cuts you can buy. We’re talking $1 to $2 per pound on a good day. When I’m feeding a crowd at one of my backyard cookouts — and believe me, Kansas City folks show up hungry — chicken legs are my go-to when I want maximum flavor without maxing out the credit card.
They Take to BBQ Sauce Like Nothing Else
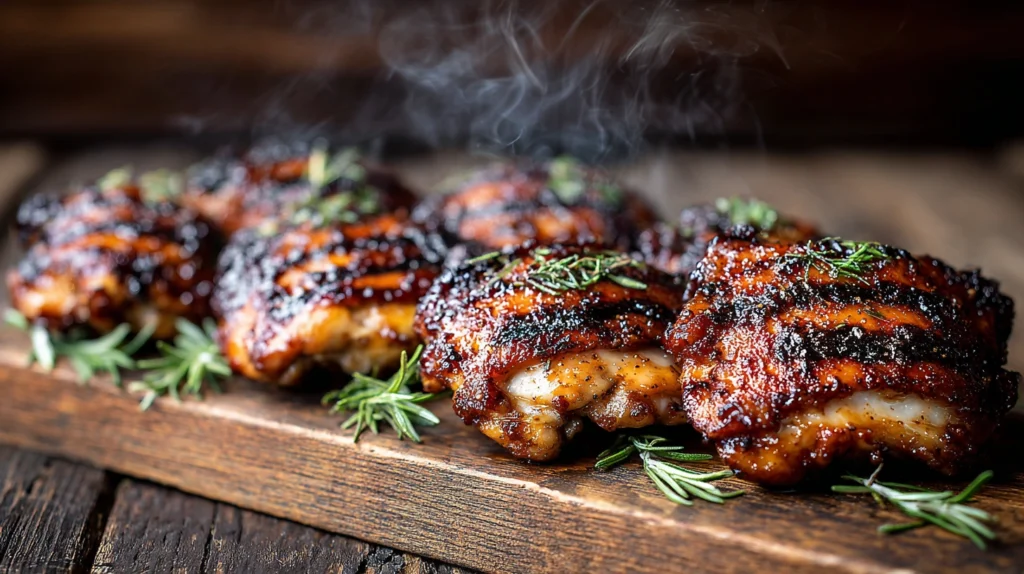
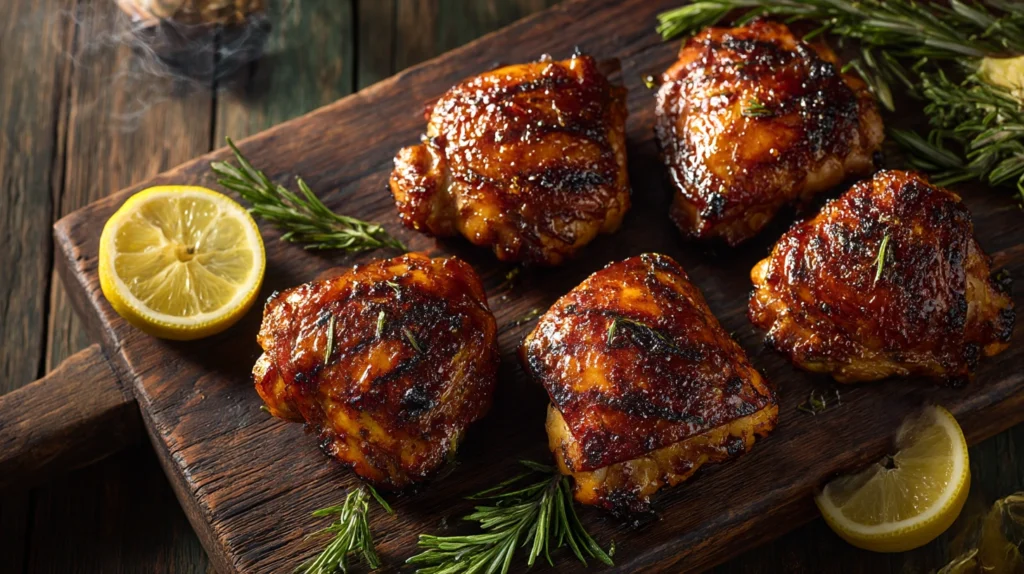
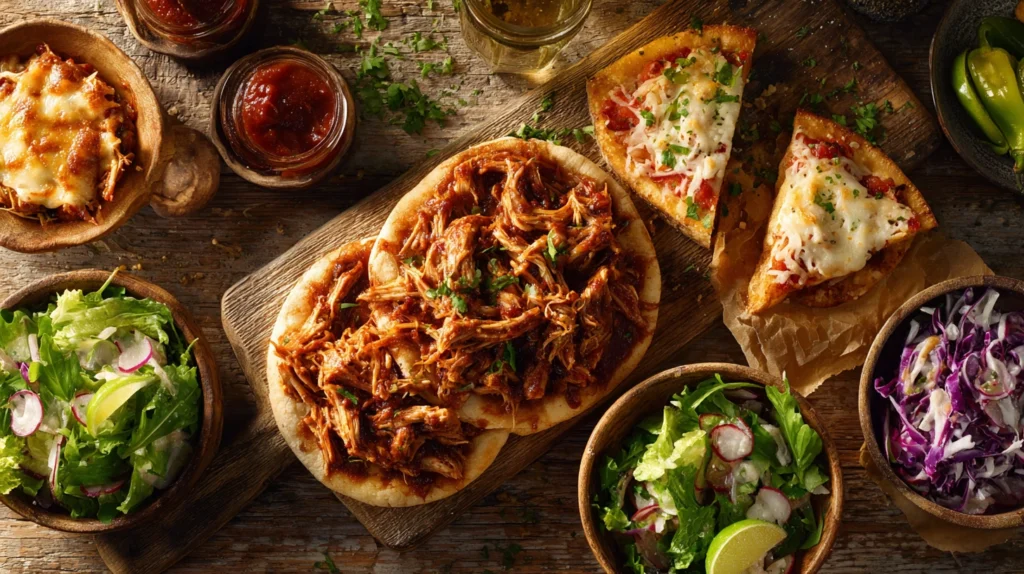
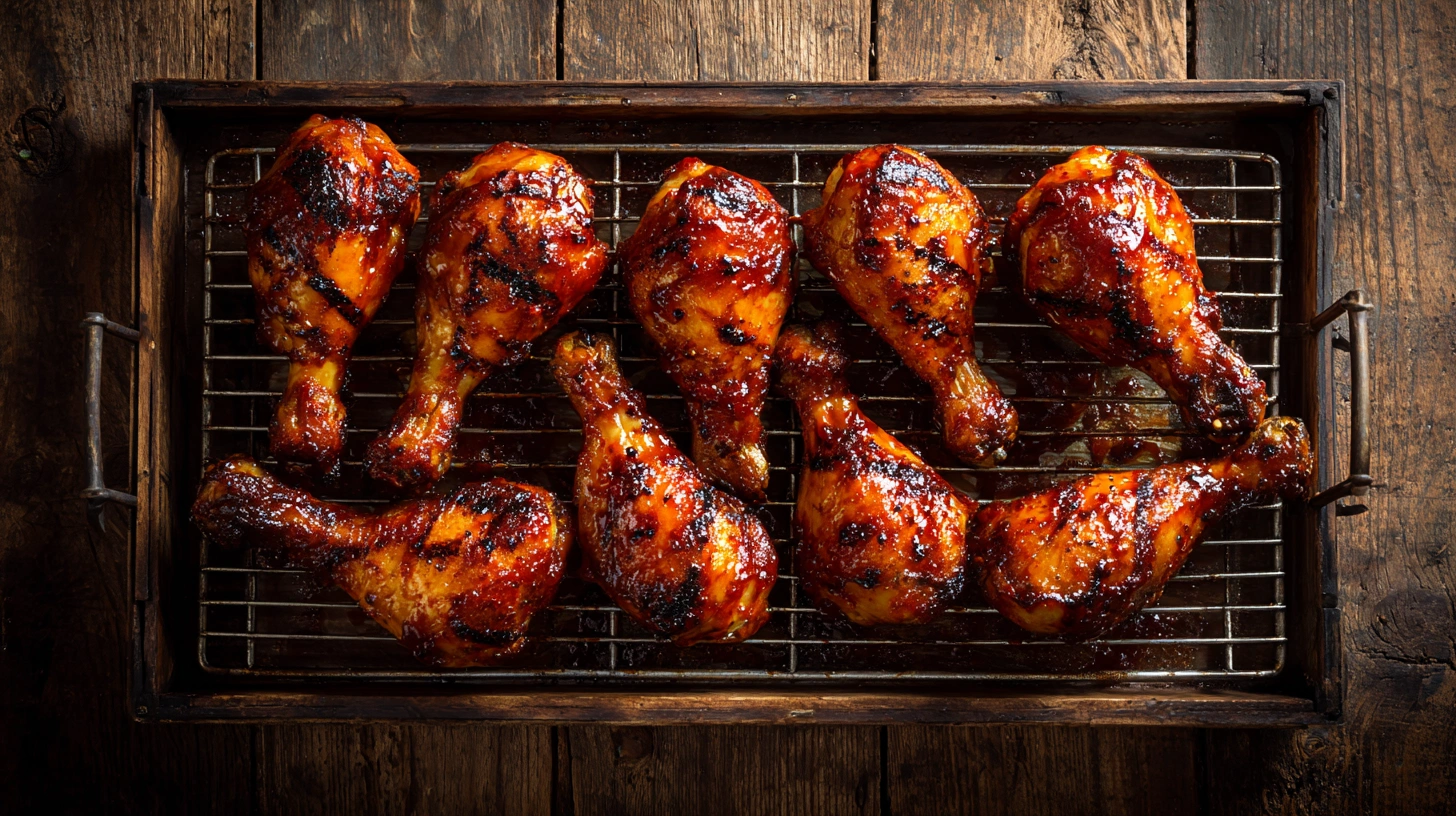
That knobby shape with all the ridges and curves? That’s surface area, baby. And surface area means more places for sauce to grab on and caramelize. When BBQ sauce hits high heat, the sugars caramelize and you get that lacquered, slightly charred, sticky coating that makes people fight over the last piece. That right there is what we’re after.
Choosing the Right Temperature: A Deeper Dive
375°F — The Low-and-Slow Oven Approach
This is what I’d call the “set it and forget it” temperature. At 375°F, you’re giving the chicken legs plenty of time to cook through gently. The fat renders slowly, the meat stays incredibly juicy, and you get a nice even cook from edge to center.
Best for: Families with younger kids who prefer tender, fall-off-the-bone meat. Also great if you’re cooking a large batch — say 15 or 20 drumsticks — because the lower heat handles crowded pans better.
The downside: The skin won’t get super crispy unless you blast it under the broiler for the last 2–3 minutes. I almost always do this, actually. A little broiler action at the end is like the barbecue equivalent of a mic drop.
400°F — The Sweet Spot
If I had to pick one temperature for the rest of my life — which, okay, would be a weird situation, but humor me — I’d pick 400°F. It’s the Goldilocks zone. Hot enough to render the fat and crisp the skin, gentle enough to keep the interior moist and tender.
Cook time at 400°F: Plan on 35–45 minutes. I flip mine once, about halfway through, to get even browning on all sides. And I always use a wire rack set inside a sheet pan. That little detail makes a world of difference — I’ll explain why in a second.
425°F — When You Want It Fast and Crispy
Running late? Company’s arriving in 45 minutes and you haven’t started dinner? 425°F is your friend. The high heat gets color on the skin fast and cuts cooking time down. But here’s the catch — you need to watch it more carefully, and you should apply your BBQ sauce later in the cook (the last 10–15 minutes) so it doesn’t burn.
BBQ sauce has sugar. Sugar burns. It’s just chemistry. At 425°F, sauce applied too early goes from “beautifully caramelized” to “black and bitter” real quick. Learned that one the hard way at a competition in Memphis about twelve years ago. My team still gives me grief about it.
The Equipment That Actually Matters
Get Yourself a Meat Thermometer
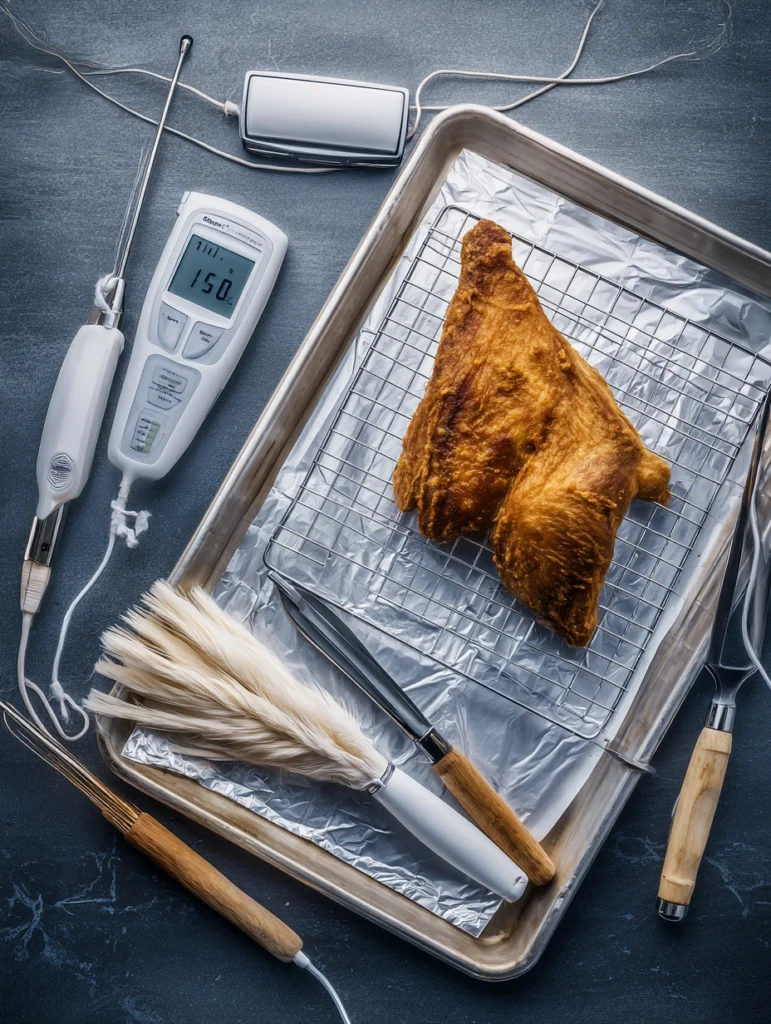
I cannot stress this enough. If you take one thing away from this article, let it be this: buy an instant-read meat thermometer. They cost about $15 and they eliminate guessing entirely. I’ve got a drawer full of fancy thermometers at the restaurant — Thermapens, wireless probes, you name it — but even a basic digital instant-read from the grocery store checkout line will change your cooking life.
Stick it into the thickest part of the drumstick, making sure you’re not touching the bone (bone conducts heat differently and will give you a false reading). When it reads 165°F or above, you’re good.
The Wire Rack Trick
Okay, so I mentioned this earlier and I wasn’t kidding — a wire rack set inside a rimmed baking sheet is one of the best upgrades you can make to your oven chicken game. Here’s why:
When drumsticks sit flat on a baking sheet, the bottom side essentially steams in its own juices. The top gets crispy, the bottom stays soggy and pale. Nobody wants that.
A wire rack elevates the chicken so hot air circulates all the way around. Every surface gets exposed to the heat. The fat drips down, the skin crisps up on all sides, and you end up with chicken that looks and tastes like it came off a grill. Plus, cleanup is way easier — just line your sheet pan with foil underneath the rack.
My Go-To Oven BBQ Chicken Legs Recipe
Alright, enough theory. Let’s cook. This is the recipe I make at home at least twice a month. It’s dead simple, it feeds a family of four to six, and it never fails to get compliments. My neighbor Dave actually asked me for this recipe last summer, and Dave is a guy who thinks ketchup on a well-done steak is “fine dining,” so take that endorsement for what it’s worth.
Ingredients

| Ingredient | Amount | Notes |
|---|---|---|
| Chicken drumsticks | 8–10 pieces (about 3 lbs) | Pat dry with paper towels |
| Olive oil or avocado oil | 2 tablespoons | Helps the rub stick and promotes browning |
| Smoked paprika | 1 tablespoon | The smoky backbone of the rub |
| Garlic powder | 1 teaspoon | — |
| Onion powder | 1 teaspoon | — |
| Brown sugar | 1 tablespoon | Adds caramelization |
| Kosher salt | 1½ teaspoons | Use less if your BBQ sauce is salty |
| Black pepper | 1 teaspoon | Freshly cracked is always better |
| Cayenne pepper | ¼ teaspoon (optional) | For a little kick |
| Your favorite BBQ sauce | 1 cup | I use a Kansas City-style sweet and smoky sauce |
The Dry Rub
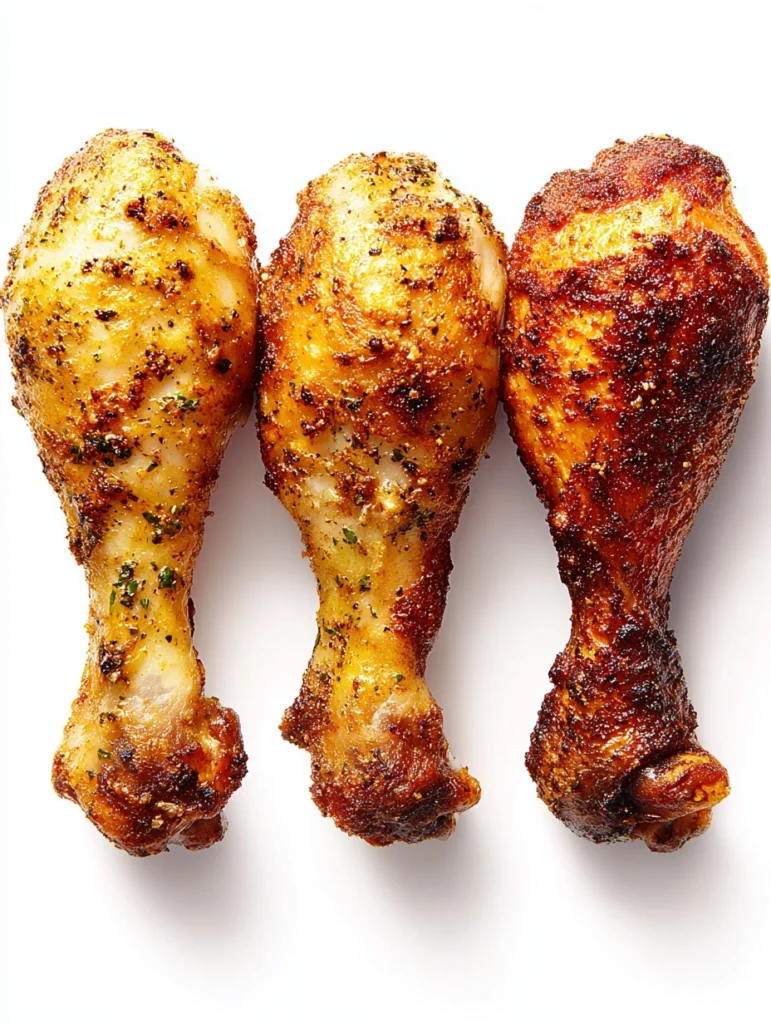
Mix the smoked paprika, garlic powder, onion powder, brown sugar, salt, pepper, and cayenne together in a small bowl. This is your dry rub — and honestly, you can make a big batch and keep it in a jar for months. I keep a mason jar of this stuff in my pantry at all times. It’s good on pork chops, ribs, even roasted vegetables if you’re feeling virtuous.
Instructions
Step 1: Prep the Chicken (5 minutes)

Preheat your oven to 400°F (205°C). While it heats up, take your drumsticks out of the package and pat them completely dry with paper towels. This step is critical — moisture is the enemy of crispy skin. I mean it, really get in there and dry them off. Both sides.
Toss the drumsticks with olive oil in a large bowl until they’re lightly coated, then sprinkle the dry rub all over them. Use your hands. Get it into every nook and cranny. This is tactile cooking and it should feel good.
Step 2: Arrange on the Rack (2 minutes)
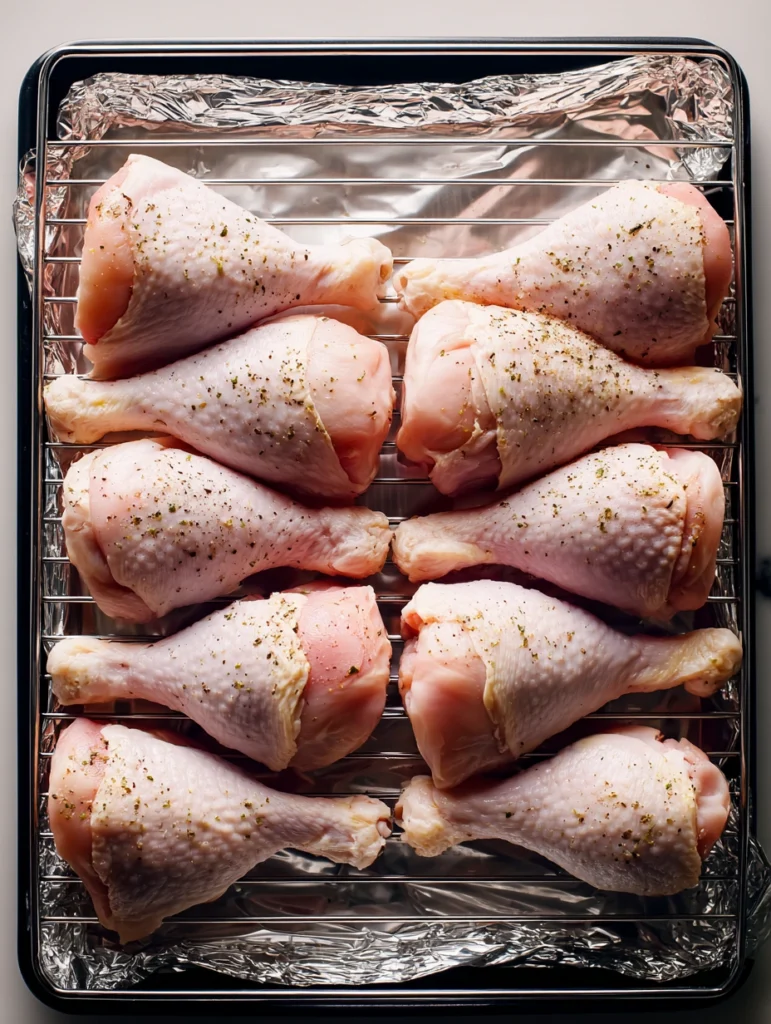
Place a wire rack on a foil-lined rimmed baking sheet. Arrange the drumsticks on the rack with a little space between each one — about an inch is plenty. Don’t crowd them. Air needs to move.
If you don’t have a wire rack, you can place them directly on a foil-lined, lightly greased baking sheet. They’ll still be delicious, just not quite as crispy on the bottom.
Step 3: Bake — Phase One (25–30 minutes)

Slide the pan into the oven and let the chicken bake without any sauce for 25–30 minutes. This is the dry phase, where the skin starts to render and get golden. Resist the urge to open the oven door. I know it smells amazing. Be strong.
Step 4: Sauce It Up — Phase Two (10–15 minutes)
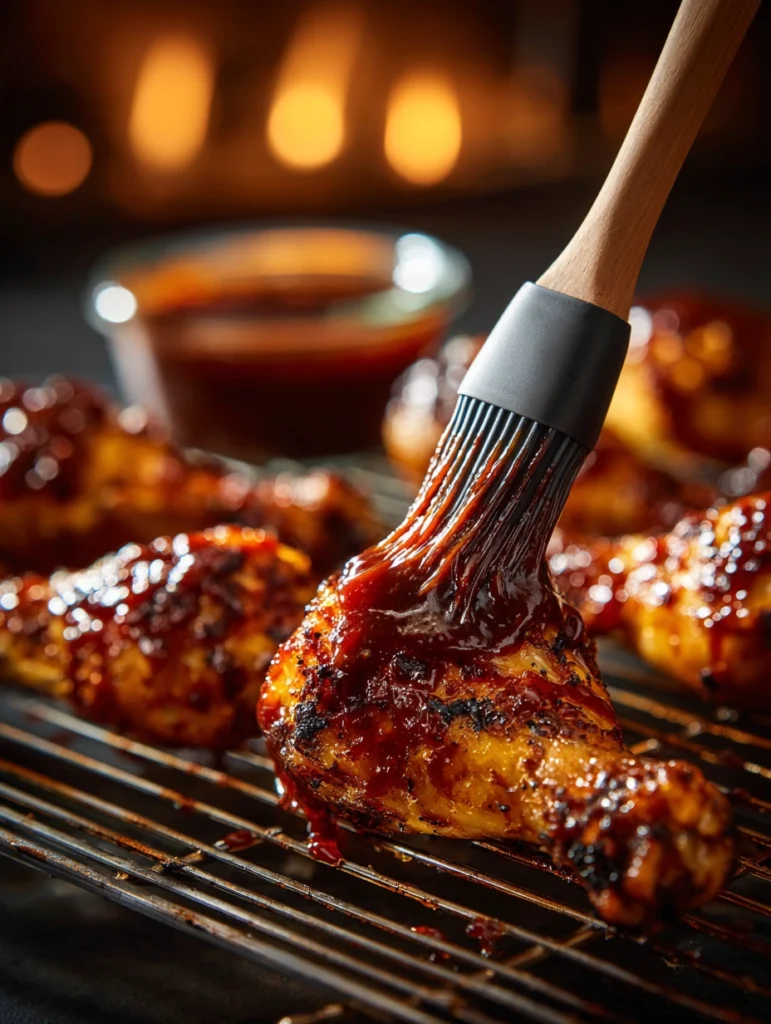
Pull the pan out and brush a generous layer of BBQ sauce over each drumstick. Don’t be shy — really slather it on. Then put them back in the oven for another 10–15 minutes. The sauce will bubble, thicken, and start to caramelize. This is where the magic happens.
Pro tip from the competition circuit: For an even stickier, more layered glaze, pull them out and sauce them a second time at the 5-minute mark. Two coats of sauce beats one coat every single time. That’s a technique we use at the restaurant and it makes a noticeable difference.
Step 5: The Optional Broiler Finish (2–3 minutes)

Okay, this step is optional but I highly recommend it. Switch your oven to broil and position the rack about 6 inches from the heating element. Broil for 2–3 minutes, watching carefully, until the sauce gets those gorgeous charred spots. This mimics the direct flame you’d get from a grill or smoker. Keep your eye on it though — broilers go from perfect to burnt in about 30 seconds.
Step 6: Rest and Serve (5 minutes)
Take the chicken out, let it rest on the rack for about 5 minutes. I know, I know — five more minutes feels like an eternity when your kitchen smells like a barbecue joint. But resting lets the juices redistribute so they stay in the meat instead of running all over your plate.
Serve with your favorite sides. I’m partial to coleslaw, cornbread, and baked beans. Classic Kansas City, right there.

Total Timeline
| Phase | Time | What’s Happening |
|---|---|---|
| Prep and season | 5–7 minutes | Dry, oil, and season the drumsticks |
| Dry bake (no sauce) | 25–30 minutes | Skin renders and crisps |
| Sauce bake | 10–15 minutes | BBQ sauce caramelizes |
| Broiler finish (optional) | 2–3 minutes | Charred, sticky perfection |
| Rest | 5 minutes | Juices redistribute |
| Total | About 50–60 minutes | Mostly hands-off |
Common Mistakes (And How to Avoid Them)
Saucing Too Early
I’ve said it already but it bears repeating — if you put BBQ sauce on raw chicken and throw it in the oven for 45 minutes, you’re going to have a bad time. The sugars in the sauce will burn long before the chicken is cooked through. Always do a dry bake first, sauce second.
Skipping the Pat-Dry Step
Wet chicken skin = steam = soggy. Takes 30 seconds. Do it.
Overcrowding the Pan
When drumsticks are touching each other, they steam instead of roast. The skin never crisps. Give them breathing room. If you’re cooking for a crowd, use two sheet pans. Your future self will thank you.
Not Checking the Temperature
“It looks done” is not a temperature. It just isn’t. I’ve been cooking professionally for over twenty years and I still use a thermometer every single time. There’s no macho points for guessing.
Using Cold Chicken
Take your drumsticks out of the fridge about 20–30 minutes before cooking. Room temperature chicken cooks more evenly than ice-cold chicken. This is especially important for thicker drumsticks.
Variations and Flavor Ideas
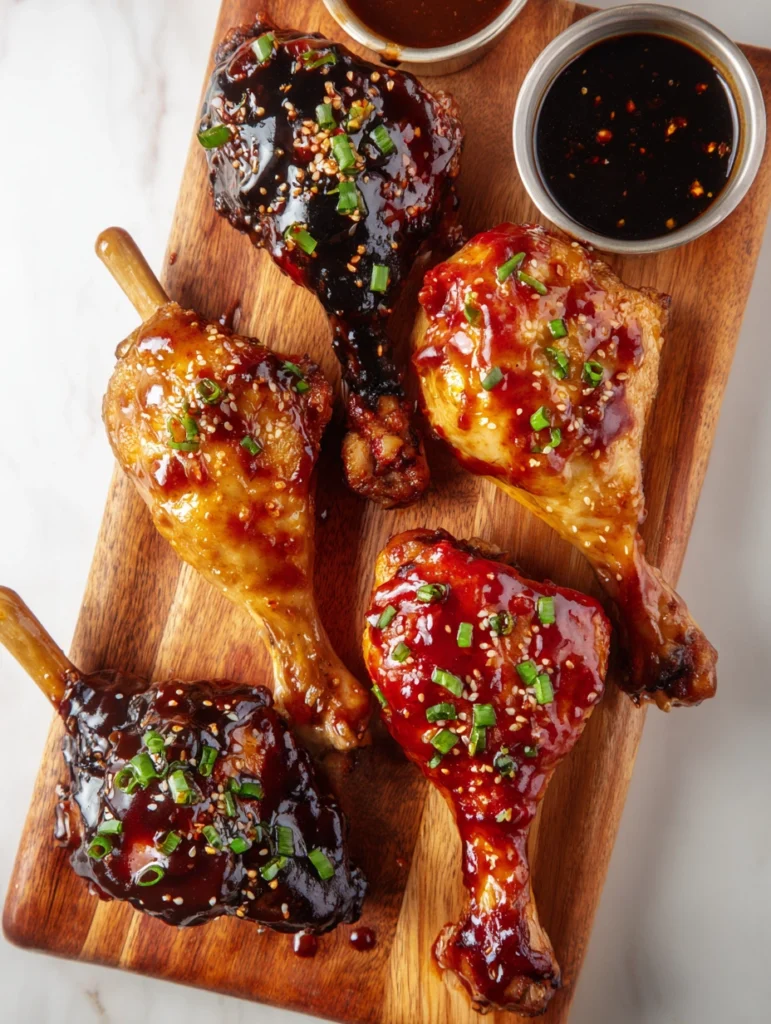
Once you’ve nailed the basic technique, the world is your oyster. Or your chicken leg, I suppose. Here are some of my favorite twists:
Honey Garlic BBQ
Mix ¼ cup honey, 3 cloves of minced garlic, and a tablespoon of soy sauce into your BBQ sauce before brushing it on. The honey adds extra stickiness and the garlic gives it a sharp, savory punch. This one is an absolute crowd-pleaser at my backyard cookouts.
Spicy Nashville-Style
Add an extra teaspoon of cayenne to the dry rub, plus a tablespoon of hot sauce mixed into the BBQ sauce. Serve on white bread with pickle chips. Is it authentic Nashville hot chicken? No. Is it delicious? Absolutely.
Asian-Inspired Hoisin Glaze
Swap the BBQ sauce for a mixture of hoisin sauce, rice vinegar, sesame oil, and a little sriracha. Finish with toasted sesame seeds and sliced scallions. My buddy Marcus, who competes on the competition circuit with me, introduced me to this one, and I’m not exaggerating when I say it changed how I think about drumsticks.
Alabama White Sauce
If you’ve never tried white BBQ sauce, you’re missing out. It’s a mayonnaise-based sauce with vinegar, horseradish, and black pepper that originated in northern Alabama. Tangy, creamy, and completely different from anything tomato-based. Use it as a dipping sauce on the side rather than baking it on.
Storing and Reheating Leftovers
If you have leftovers — and that’s a big “if” in my house — here’s how to handle them:
Storage
Let the chicken cool to room temperature (don’t leave it out more than two hours though, food safety matters). Store in an airtight container in the fridge for up to 3–4 days.
Reheating
Here’s where most people go wrong. The microwave will get the job done, but it turns that beautiful crispy skin into a sad, rubbery wrapper. Instead, reheat in a 350°F oven for 10–15 minutes. If you want to refresh the glaze, brush on a thin layer of sauce before reheating. The skin won’t be quite as crispy as fresh, but it’ll be close.
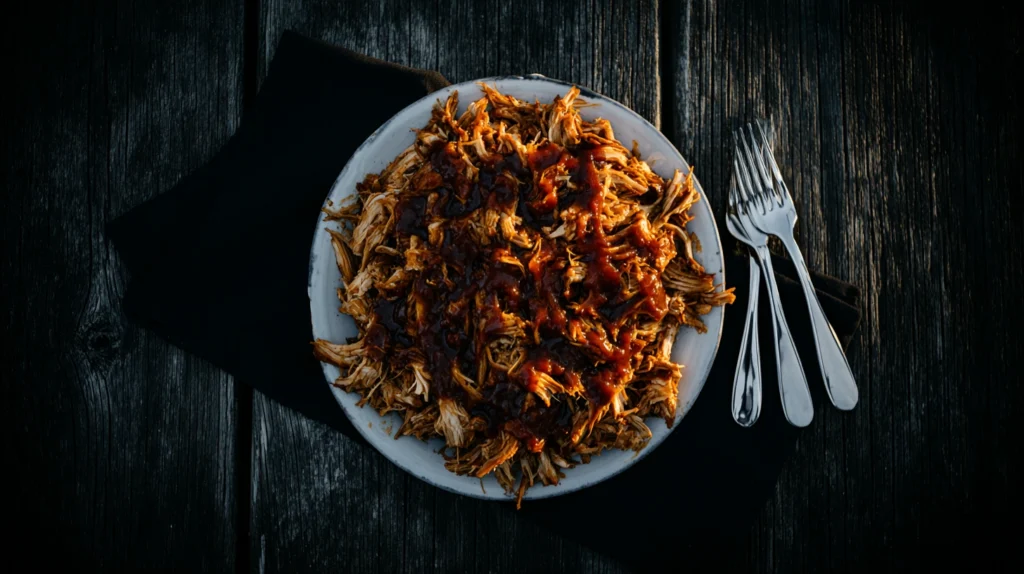
You can also chop leftover drumstick meat and use it in tacos, fried rice, quesadillas, or on top of a salad. BBQ chicken meat is one of the most versatile leftover proteins you can have in your fridge.
Frequently Asked Questions
Can I Use Frozen Chicken Legs?
You can, but I’d strongly recommend thawing them first. Frozen drumsticks will release a ton of moisture as they cook, making crispy skin nearly impossible. Thaw in the fridge overnight or in a bowl of cold water for about an hour.
Do I Need to Flip the Chicken?
If you’re using a wire rack, nope — the air circulates all around. If you’re cooking directly on a sheet pan, flip them once about halfway through for even browning.
Can I Use This Method for Chicken Thighs?
Absolutely. Bone-in, skin-on thighs are essentially the same cook. Same temperatures, similar timing (maybe a few minutes longer for really thick thighs). The technique works beautifully.
What’s the Best BBQ Sauce to Use?
Honestly, use whatever you love. Sweet Kansas City-style, tangy Carolina mustard sauce, spicy Texas-style — they all work. If you’re feeling ambitious, make your own. If you’re feeling lazy, grab a bottle of something good from the store. No judgment here. We’re all just trying to get dinner on the table.
Final Thoughts From the Pit
Anyway, I know we covered a lot of ground here, but if you remember nothing else, remember this: 400°F, 35–45 minutes, sauce in the last 10–15, and always use a thermometer. That formula will give you perfect oven BBQ chicken legs every single time.
I’ve spent the better part of my career standing over smokers and grills, and I genuinely believe that great barbecue doesn’t require expensive equipment or years of training. It just requires paying attention, respecting the basics, and not being afraid to get your hands a little sticky.
So fire up that oven, grab some drumsticks, and go make something delicious tonight. I believe in you. And when those chicken legs come out golden, sticky, and caramelized — and your family is fighting over the last one — just remember: you learned it from the Grill Master.