How Long to BBQ Bone In Chicken Thighs Juicy, Crispy Results Every Time
Look, I’m going to be honest with you. For years—years!—I thought I had chicken thighs all figured out. I’d been cooking barbecue professionally since my mid-twenties, competing on the circuit, running a restaurant kitchen, the whole nine yards. And then one random Tuesday afternoon, I pulled a batch of bone-in thighs off my Weber that were so perfect, so ridiculously juicy with skin so crispy you could hear the snap from across the patio, that I realized everything I’d been doing before was only about 80% of the way there.
That’s the thing about barbecue. You can be good for a long time before you stumble into great. And bone-in chicken thighs? They’re the most forgiving cut on the grill, but that forgiveness can actually work against you. Because “good enough” is easy, and people stop pushing.
So today, I’m giving you the full playbook. We’re talking exact temperatures, precise timing, the marinades I actually use at the restaurant, and—maybe most importantly—the mistakes I see backyard grillers make over and over again. By the end of this article, you’ll know exactly how long to BBQ bone-in chicken thighs for results that’ll have your neighbors suddenly finding excuses to drop by on cookout day.
Why Bone-In Chicken Thighs Are the King of the Grill
Before we get into the timing, let me preach for a minute about why bone-in, skin-on chicken thighs are the single best cut you can throw on a grill. I know chicken breasts get all the grocery store marketing love, but here’s the reality: thighs are more flavorful, harder to overcook, and cheaper per pound. It’s a triple threat.
The bone acts as an insulator, which means the meat around it cooks more gently and retains moisture better. The skin, when treated right, renders down into this gorgeous, crackling layer that’s basically nature’s potato chip. And the higher fat content in the thigh means you’ve got a built-in basting system. The meat is literally seasoning itself as it cooks.
I remember back when I first started competing, an old pit master from Memphis named Earl told me, “Son, anybody can cook a brisket. It takes a real cook to make a chicken thigh sing.” I thought he was full of it at the time. Turns out Earl was one of the smartest guys I ever met.
The Quick Answer: How Long to BBQ Bone-In Chicken Thighs
I know some of you are in a hurry—maybe you’ve already got charcoal lit and you just need a number. So here it is:
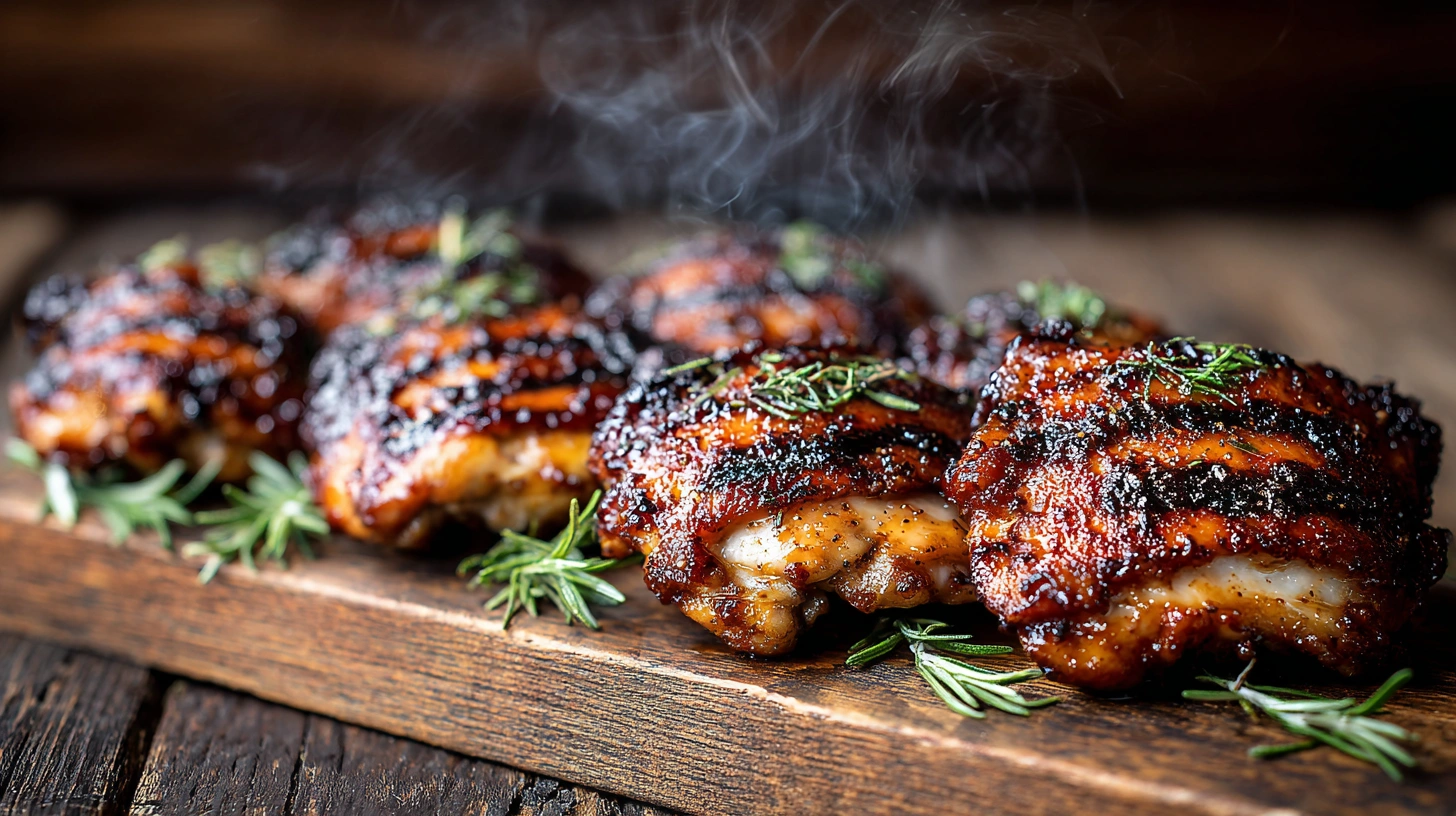
Grill bone-in, skin-on chicken thighs over indirect heat at 350°F to 375°F for 35 to 45 minutes, then finish over direct heat for 2 to 3 minutes per side to crisp the skin. Internal temperature should hit 185°F to 190°F for the best texture.
Wait—185°F? Isn’t the USDA safe temp 165°F? Yep, it sure is. And if you pull your thighs at 165°F, they’ll be safe to eat. But they won’t be great. The connective tissue in thigh meat doesn’t fully break down until you hit that 180°F to 190°F range, and that breakdown is what gives you that fall-off-the-bone, melt-in-your-mouth texture. Trust the process.
BBQ Chicken Thigh Timing Chart
Here’s a quick reference I keep taped inside my grill cart. Different methods, different times—but all roads lead to delicious.
| Method | Grill Temp | Cook Time | Internal Temp | Skin Finish |
| Indirect Heat (Standard) | 350–375°F | 35–45 min | 185–190°F | 2–3 min direct/side |
| Low & Slow (Smoked) | 225–250°F | 1.5–2 hrs | 185–190°F | Sear at end or broil |
| Hot & Fast | 400–425°F | 25–35 min | 185–190°F | Built-in from heat |
| Reverse Sear | 250°F → 450°F | 40–50 min total | 185–190°F | Final 5 min blast |
My Step-by-Step Method (The One I Actually Use)
Alright, let’s get into the nitty-gritty. This is the exact method I use at the restaurant for our BBQ chicken thigh plate, adapted for a standard kettle grill or gas grill. It works every single time.
Step 1: Prep Your Thighs (Don’t Skip This)
Pull your chicken thighs out of the fridge 20 to 30 minutes before grilling. Cold chicken on a hot grill is a recipe for uneven cooking. While they’re coming up to room temp, pat them dry with paper towels. And I mean really dry. Moisture is the enemy of crispy skin.
Here’s a little trick I learned that changed my game: score the skin side with a sharp knife in a crosshatch pattern, cutting just through the skin but not into the meat. This does two things—it lets the fat render out more efficiently, and it gives your seasoning more surface area to cling to. Small move, massive difference.
Step 2: Season Like You Mean It
I season my thighs generously on both sides. Some folks are timid with seasoning, and honestly, that’s the number one reason most home-grilled chicken tastes bland. The bone and skin act as barriers, so you need more seasoning than you think.
My go-to rub for competition chicken? Here it is:
Gus’s All-Purpose Chicken Rub
| Ingredient | Amount |
| Smoked paprika | 2 tablespoons |
| Brown sugar | 2 tablespoons |
| Garlic powder | 1 tablespoon |
| Onion powder | 1 tablespoon |
| Kosher salt | 1 tablespoon |
| Black pepper | 2 teaspoons |
| Chili powder | 1 teaspoon |
| Cayenne pepper | 1/2 teaspoon (adjust to taste) |
| Dried thyme | 1 teaspoon |
| Mustard powder | 1 teaspoon |
Mix it all together and store it in a mason jar. This makes enough for about 8 to 10 thighs, and it keeps for a couple months in a cool, dark pantry. The brown sugar is key—it helps with caramelization and gives you that gorgeous mahogany color everybody wants.

Step 3: Set Up Your Grill for Two-Zone Cooking
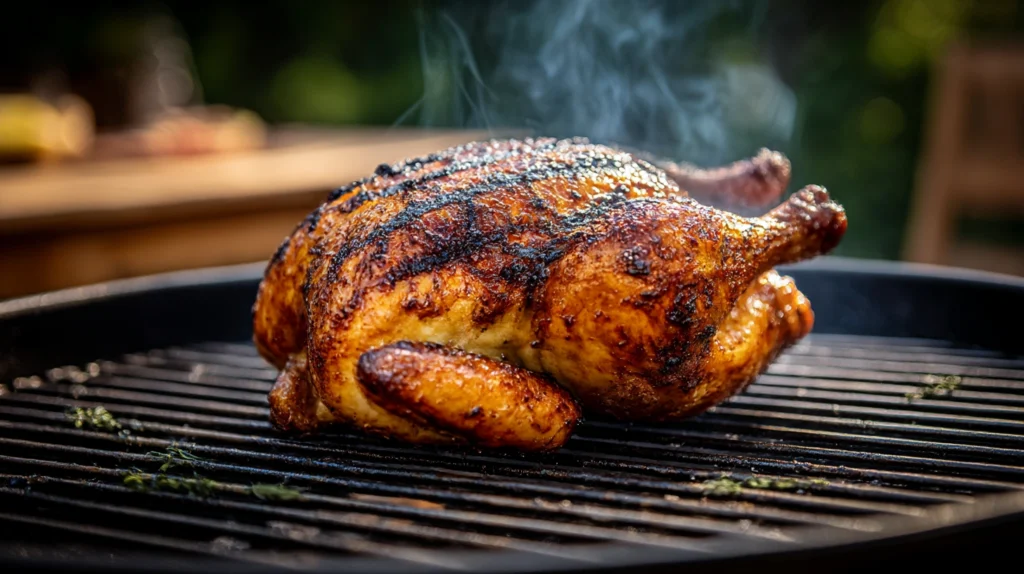
This is non-negotiable. If you’re trying to grill chicken thighs over direct heat the entire time, you’re going to get charred skin and raw meat near the bone. Been there, done that, ruined a Fourth of July.
Two-zone cooking means you’ve got a hot side and a cool side. On a charcoal grill, push all your coals to one side. On a gas grill, light one or two burners and leave the rest off. You want the indirect side sitting at 350°F to 375°F. Get a good grill thermometer if you don’t have one—don’t trust that dial on the lid, it lies.

Step 4: Cook Low, Finish High
Place your thighs skin-side up on the indirect (cool) side of the grill. Close the lid and let them cook for 35 to 45 minutes. Resist the urge to peek every five minutes. Every time you lift that lid, you lose heat and extend your cook time. I tell people: if you’re lookin’, you ain’t cookin’.
Around the 30-minute mark, start checking your internal temperature with an instant-read thermometer. You’re inserting it into the thickest part of the thigh, but not touching the bone (the bone conducts heat and will give you a false high reading).
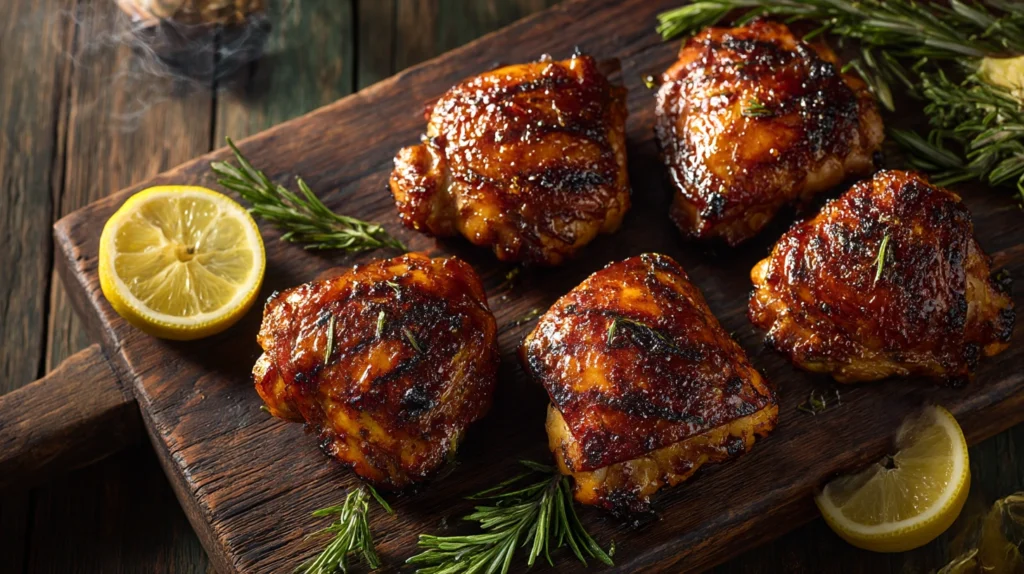
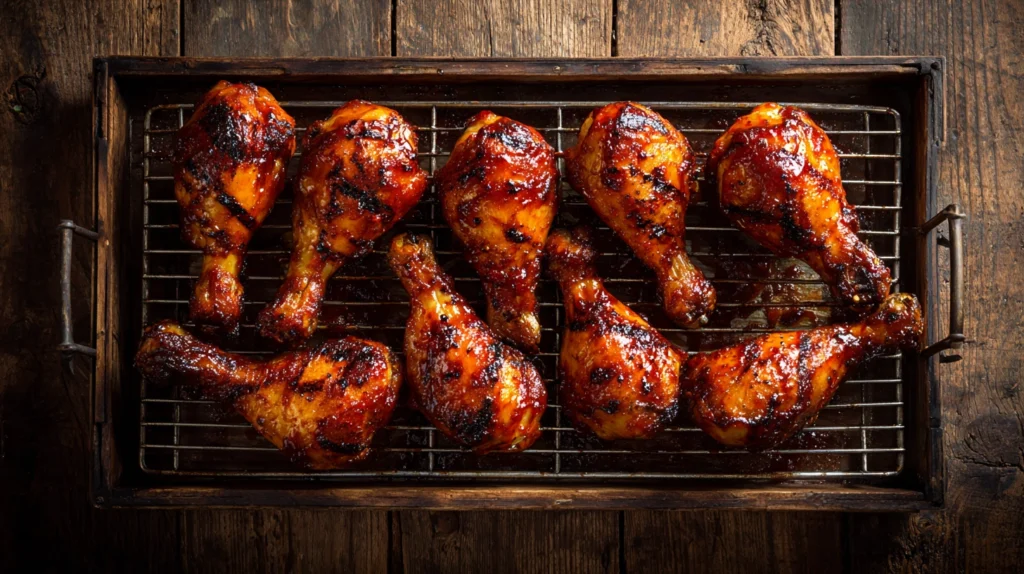
Once you hit 180°F internally, move the thighs to the direct heat side, skin-side down. Now you’re watching them like a hawk. Two to three minutes per side, just enough to crisp that skin and get some char marks. Pull them when the internal temp reads 185°F to 190°F.

Step 5: Rest, Then Sauce (If You Want)
Let those thighs rest on a cutting board for 5 minutes. This isn’t optional—cutting into meat immediately lets all those juices escape onto the board instead of staying in the chicken where they belong.
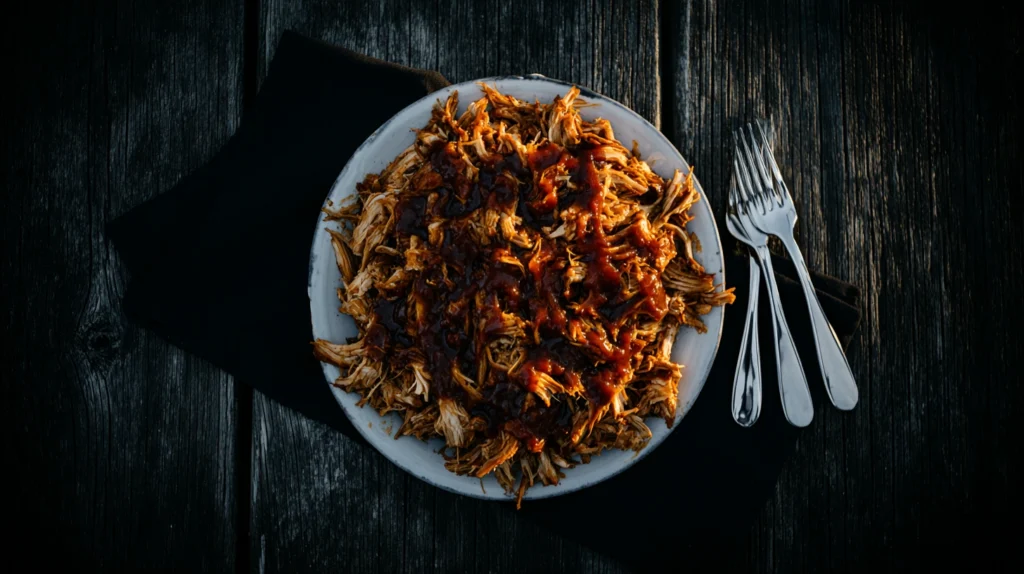
If you’re saucing, brush it on during the last few minutes of the direct heat sear. Putting sauce on too early is one of the biggest mistakes I see. The sugars in BBQ sauce burn at relatively low temperatures, and you’ll end up with a bitter, blackened mess instead of a beautiful glaze.
Three Marinades That’ll Change Your Chicken Game
Sometimes I skip the dry rub and go with a marinade instead. Here are three of my favorites—each one brings a totally different flavor profile. Marinate for at least 2 hours, but overnight is where the magic really happens.
1. Kansas City Classic
| Ingredient | Amount |
| Apple cider vinegar | 1/4 cup |
| Worcestershire sauce | 2 tablespoons |
| Yellow mustard | 1 tablespoon |
| Hot sauce (like Crystal or Frank’s) | 1 tablespoon |
| Brown sugar | 2 tablespoons |
| Garlic, minced | 3 cloves |
| Kosher salt | 1 teaspoon |
| Black pepper | 1/2 teaspoon |
This one’s tangy, a little sweet, and just the right amount of heat. It’s my go-to when I’m keeping things traditional.
2. Smoky Citrus & Herb

| Ingredient | Amount |
| Orange juice (fresh squeezed) | 1/3 cup |
| Lime juice | 2 tablespoons |
| Olive oil | 2 tablespoons |
| Smoked paprika | 1 tablespoon |
| Cumin | 1 teaspoon |
| Fresh cilantro, chopped | 2 tablespoons |
| Garlic, minced | 4 cloves |
| Chipotle in adobo, minced | 1 pepper + 1 tsp sauce |
This one came to me during a trip to Austin where I had this incredible citrus-chipotle chicken at a food truck. I spent two weeks reverse-engineering it. The fresh citrus tenderizes the meat and the chipotle gives it this deep, smoky backbone that plays beautifully with the grill char.
3. Asian-Inspired Soy & Ginger Glaze
| Ingredient | Amount |
| Soy sauce (low sodium) | 1/4 cup |
| Rice vinegar | 2 tablespoons |
| Sesame oil | 1 tablespoon |
| Honey | 2 tablespoons |
| Fresh ginger, grated | 1 tablespoon |
| Garlic, minced | 3 cloves |
| Sriracha | 1 teaspoon |
| Green onions, sliced | For garnish |
I know, I know—an Asian-inspired marinade from a KC pit master? Look, good food is good food. This one’s become a crowd favorite at my backyard cookouts. The honey caramelizes like crazy, and the soy-ginger combo with grilled chicken is just… chef’s kiss.
The 7 Biggest Mistakes People Make Grilling Chicken Thighs
In 20 years of grilling, I’ve made every single one of these mistakes myself. Some of them more than once. Learn from my pain.
| # | The Mistake | Why It’s a Problem & What to Do Instead |
| 1 | Cooking straight over direct heat | The skin burns before the interior cooks through. Use two-zone grilling: indirect first, then finish over direct heat for the sear. |
| 2 | Pulling at 165°F | Technically safe but texturally disappointing. Go to 185–190°F for thighs. The extra connective tissue needs that heat to break down. |
| 3 | Saucing too early | Sugar-based sauces burn fast. Apply sauce only during the final 3–5 minutes of cooking, or serve on the side. |
| 4 | Not drying the skin | Wet skin = steamed skin = rubbery skin. Pat dry thoroughly with paper towels before seasoning. |
| 5 | Lid flipping (opening too often) | Every peek adds 5–10 minutes. Set a timer, trust the process, and walk away. |
| 6 | Using lighter fluid | It leaves a chemical taste. Use a chimney starter for charcoal—it’s faster and cleaner. |
| 7 | Skipping the rest | Cutting into chicken immediately lets juices pool on the board. Five minutes of rest = juicier chicken on the plate. |
Internal Temperature Guide: What the Numbers Mean

I’m a thermometer guy. I don’t care how long you’ve been grilling—there’s no shame in using a thermometer. In fact, every professional I know uses one. Here’s a quick guide to what different internal temperatures mean for bone-in chicken thighs:
| Internal Temp | What’s Happening | Result |
| 145°F | Still undercooked near the bone | Not safe. Keep cooking. |
| 165°F | USDA safe minimum reached | Safe but firm, slightly chewy near bone. |
| 175°F | Collagen starting to break down | Good, but not at its best yet. |
| 185°F | Connective tissue melting, fat rendering | Excellent. Juicy, tender, pulls cleanly. |
| 190°F | Optimal breakdown complete | Perfect. Silky, rich, fall-off-the-bone. |
| 200°F+ | Starting to dry out | Pushing it. Still edible but losing moisture. |
The sweet spot is 185°F to 190°F. I cannot stress this enough. It’s counterintuitive if you’re used to cooking chicken breast (where anything over 165°F starts getting dry), but thighs are a completely different animal. Figuratively speaking.
Charcoal vs. Gas: Does It Matter?
I’m going to say something controversial here: for chicken thighs specifically, the difference between charcoal and gas is smaller than most grillers want to admit. Both can produce outstanding results if you manage your heat correctly.
That said, I’m a charcoal guy at heart. Lump hardwood charcoal gives you a smokier flavor and hotter sear temperatures, and there’s something primal and satisfying about cooking over real fire that a gas burner just can’t replicate. But if gas is what you’ve got, don’t let that stop you from making incredible chicken.
If you want to add smoke flavor on a gas grill, grab a smoker box or make a foil pouch with wood chips (hickory and apple are my favorites for chicken). Poke a few holes in the top, set it over a lit burner, and you’re in business.
Wood Chip Pairing Guide

| Wood | Flavor Profile | Best With |
| Hickory | Strong, bacon-like, classic | Traditional BBQ rubs |
| Apple | Mild, slightly sweet | Citrus marinades, lighter seasonings |
| Cherry | Mild, fruity, gorgeous color | Asian-inspired glazes |
| Pecan | Rich, nutty, medium smoke | Everything—my all-rounder pick |
| Mesquite | Very strong, earthy | Use sparingly or blend with milder wood |
What to Serve Alongside: Quick Side Dish Ideas
A great chicken thigh deserves great company. Here are some of my favorite sides that come together quick while the chicken’s on the grill:
- Classic coleslaw with a tangy vinegar dressing (not that mayo-heavy stuff from the deli counter)
- Grilled corn on the cob with chili-lime butter
- Southern-style baked beans—if you’ve got room on the grill, cook ’em in a cast iron skillet right next to the chicken
- Simple cucumber-tomato salad with red onion and a splash of rice vinegar
- Mac and cheese—because mac and cheese goes with literally everything
- Cornbread muffins, ideally still warm from the oven
Anyway, I could do a whole separate article on sides. The point is: keep it simple, keep it fresh, and let the chicken be the star.
Frequently Asked Questions
How do I know when bone-in chicken thighs are done without a thermometer?
Honestly? Get a thermometer. They’re like $12 and they’ll save you from serving undercooked chicken. But if you’re in a pinch, the juices should run clear (not pink) when you pierce the thickest part, and the meat should pull easily away from the bone. The joint between the thigh and drumstick should move freely. But seriously, buy a thermometer.
Can I use boneless thighs with these same times?
Boneless thighs cook significantly faster—about 20 to 25 minutes at 350°F to 375°F indirect. The target internal temp is the same (185°F for best texture), but keep a closer eye on them because they can go from done to overdone quicker without the bone moderating the heat.
Should I brine chicken thighs before grilling?
For bone-in thighs, I actually don’t brine most of the time. They’re already so moist and forgiving that a brine isn’t as necessary as it is for breast meat. If you want extra insurance, a quick 1-hour brine in a solution of 4 cups water, 1/4 cup kosher salt, and 2 tablespoons sugar won’t hurt. But it’s not a game-changer the way it is for leaner cuts.
What if I get flare-ups?
Chicken thighs are fatty, and fat dripping onto hot coals or burners causes flare-ups. This is exactly why two-zone cooking is so important—if you get a flare-up, just move the chicken to the indirect side and close the lid. The lack of oxygen will kill the flames. Never spray water on a grease fire in a grill. Just move the food and close the lid.
Can I BBQ frozen chicken thighs?
Can you? Technically yes. Should you? I’d really prefer you didn’t. Frozen thighs cook unevenly, the skin won’t crisp properly, and seasoning won’t adhere. Thaw them in the fridge overnight (or in cold water for 1 to 2 hours in a pinch) for dramatically better results.
Fire It Up: Your Turn to Make Magic
So there you have it—everything I know about BBQing bone-in chicken thighs, distilled from two decades of standing over hot coals, a few hundred competitions, and more taste tests than my doctor would probably approve of.
Here’s what I want you to take away from all of this: bone-in chicken thighs are incredibly forgiving, impossibly delicious, and way too often underestimated. Whether you’re grilling for a crowd or just cooking dinner for yourself on a Wednesday night, this cut delivers every single time.
Don’t overthink it. Get your grill set up for two zones. Season those thighs like they owe you money. Cook them to 185°F–190°F. Crisp the skin at the end. Rest for five minutes. That’s it. That’s the whole formula.
Now go light something on fire (safely and responsibly, of course) and make some incredible barbecue. I believe in you. And if you nail it—or even if you don’t—drop me a line on the blog. I love hearing from fellow grill enthusiasts, and there’s no such thing as a dumb question when it comes to cooking.
Happy grilling, friends. May your smoke be thin and blue, your chicken be juicy, and your skin be crispy.